Automatically wake up your computer from sleep or hibernation mode at a specific time of your choosing using Task Scheduler.
Using Task Scheduler, you’ll create a “trigger”, which will be the time that you want the computer to wake up, then an “action”, which will be what causes the PC to wake up, and finally set the “conditions” under which the action can run.
How To Create A Task Schedule To Wake Up Computer.
Open Windows Task Scheduler by clicking on the Start button and then typing “task scheduler“
Click Task Scheduler (App).
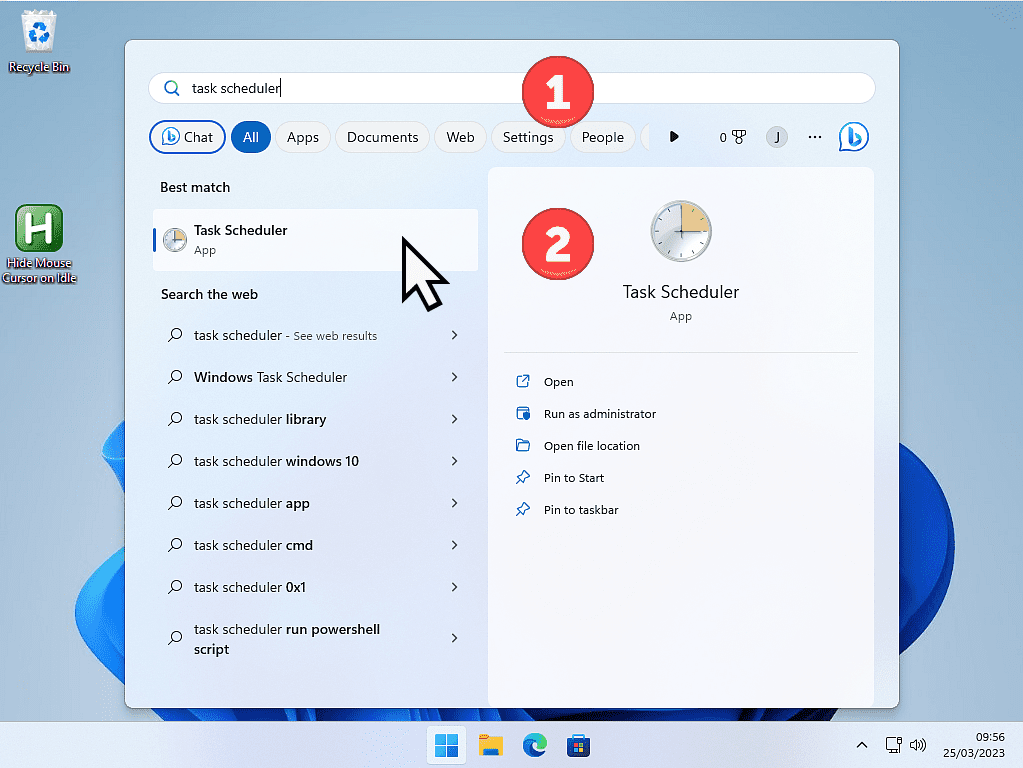
Creating The Wake Up Task.
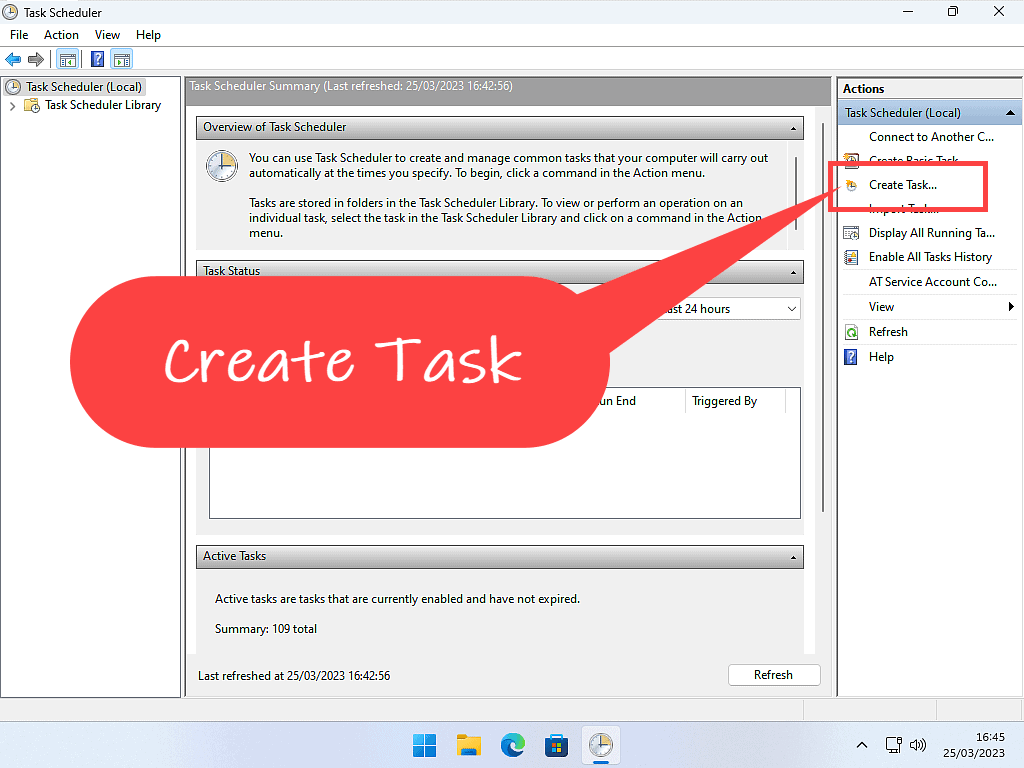
When Task Scheduler opens click Create Task.
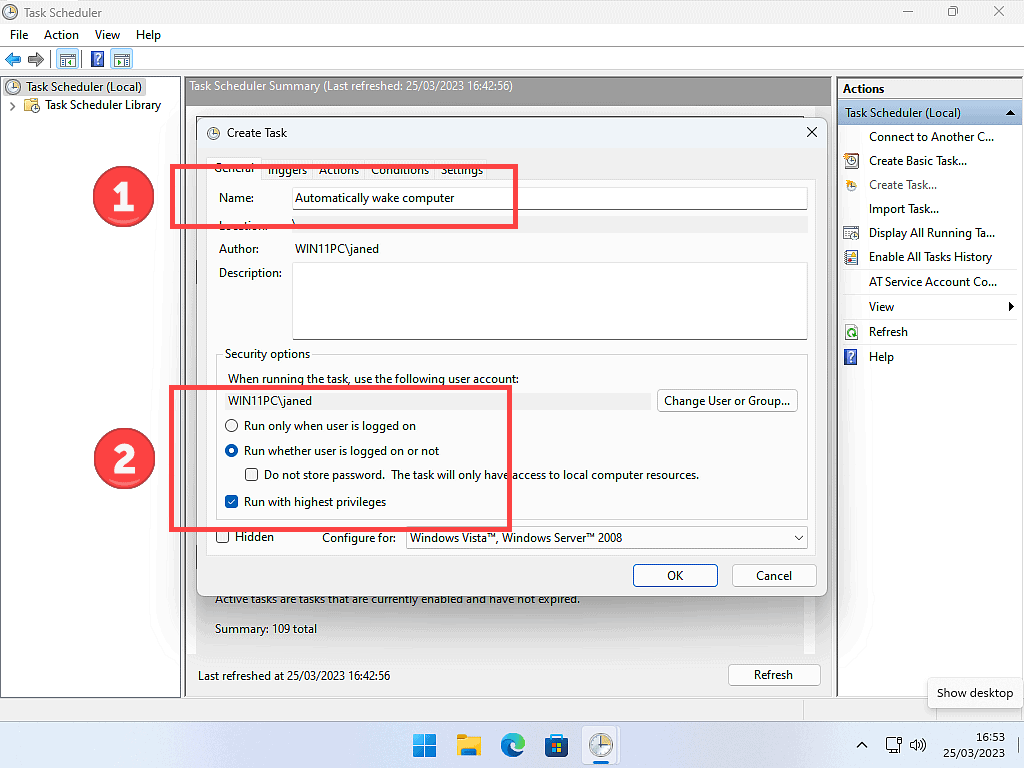
Give your new task a name. You can call it anything you like, but try to use a descriptive name so that you’ll know what it is later. Then select “Run whether user is logged on or not” and “Run with highest privileges”. Click the OK button.
Set The Time That You Want To Wake Your Computer.
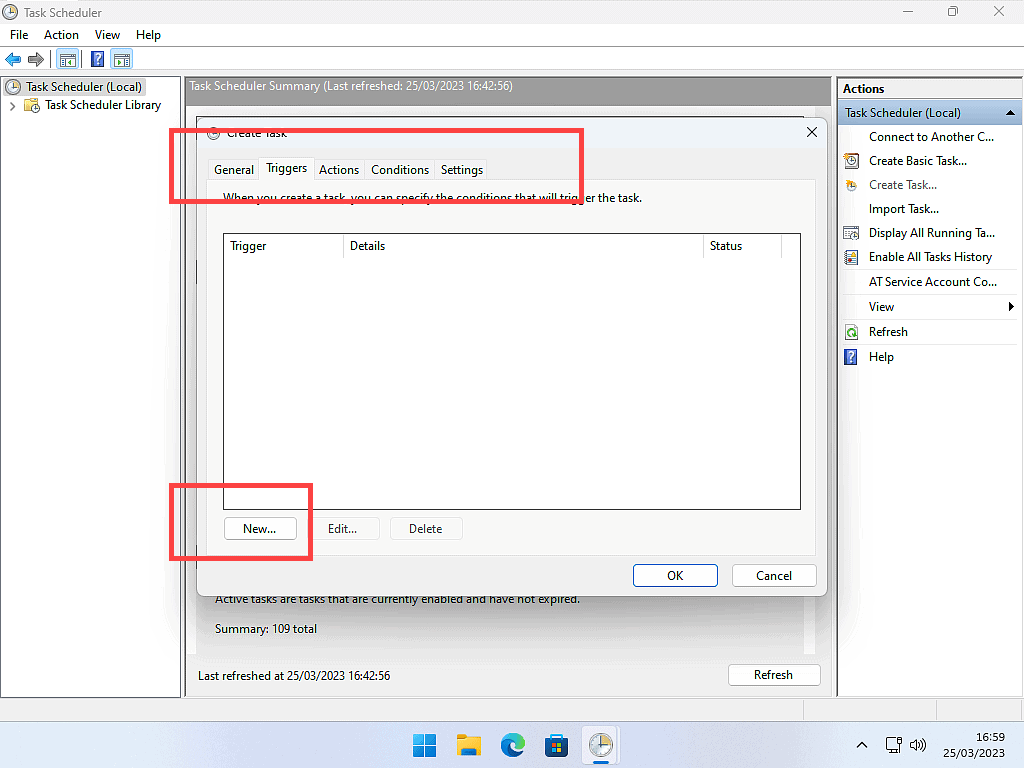
The time that you want your computer to wake up from sleep is set using the Triggers tab.
Click the Triggers tab and then click the New button.
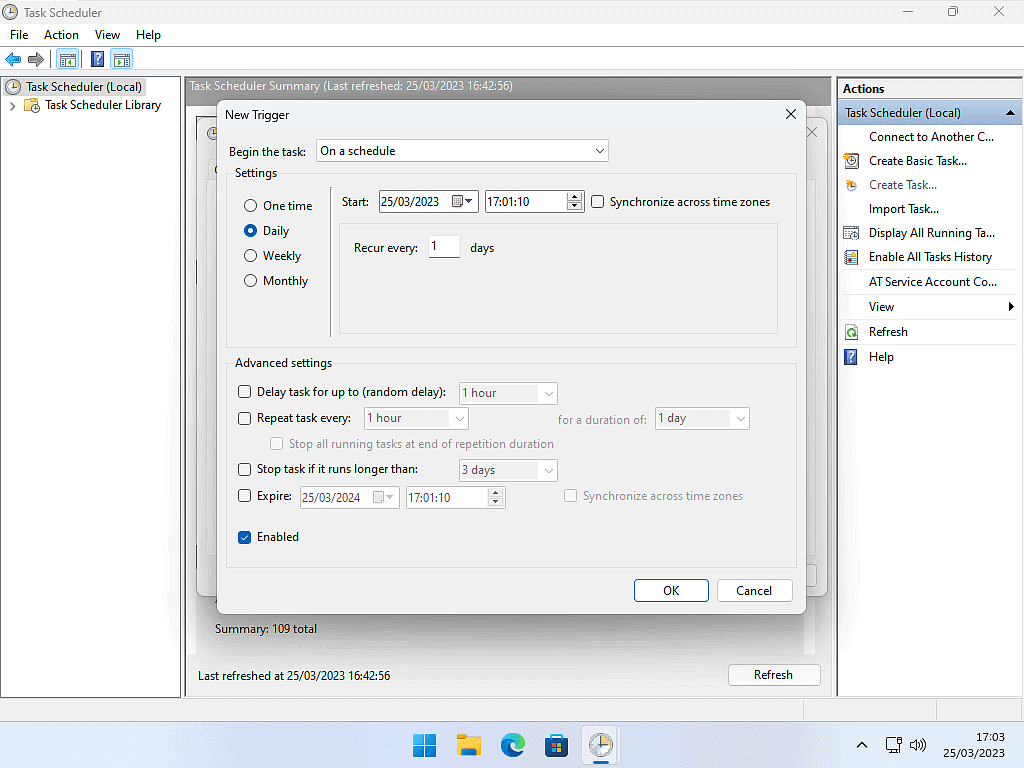
On the New Trigger page, you can set the time that you want your computer to auto wake from sleep. You can also choose to have the trigger run just the once, daily, weekly or monthly.
For example, if you’d like your PC to wake up at the same time everyday, then select daily. Click the OK button when done.
The Actions Tab.
Task Scheduler doesn’t have a specific way to automatically wake your computer from sleep. Instead you have to set an Action that’ll run and that will cause the PC to awaken.
Click the Actions Tab and then click the New button.
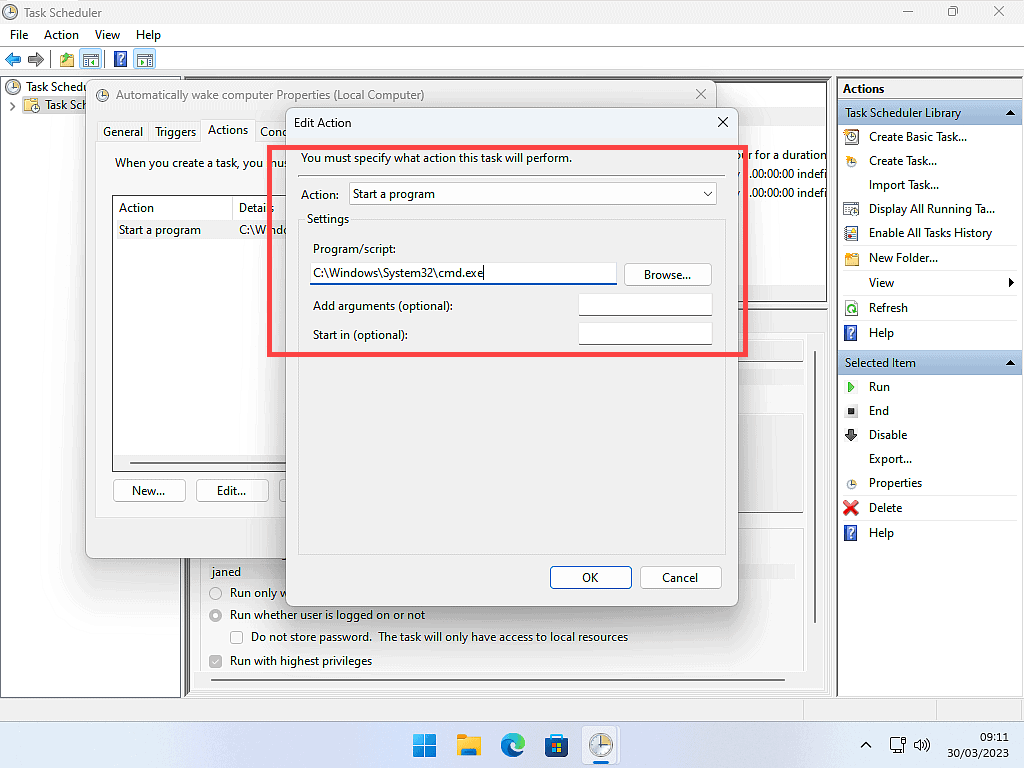
In the Actions box select “Start a program” and in the Program/Script box you need to add the path to the program that you want to run. It could be virtually any program installed on your computer. I’ve opted for the Command Prompt.
You can either type in the path or click the Browse button and navigate to the program that you want to use as your action. Click the OK button when you’re ready.
Set The Conditions.
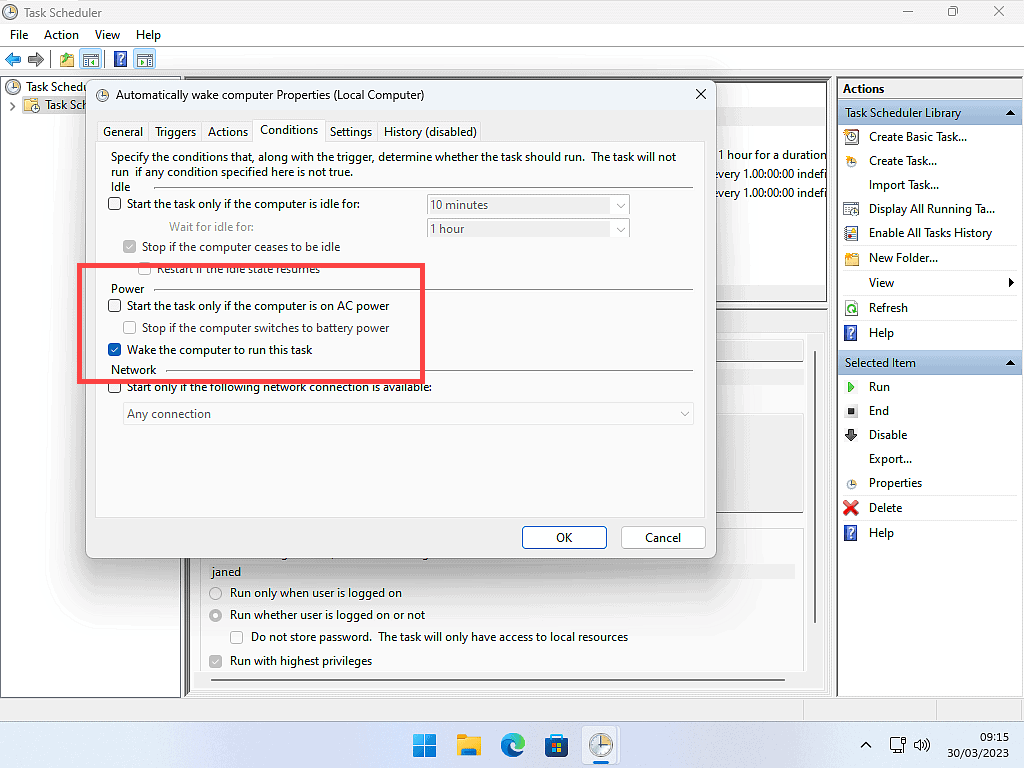
Click on the Conditions Tab and deselect “Start the task only if the computer is on AC power”. Then select “Wake the computer to run the task”. Click the OK button.
After clicking the OK button, you’ll be prompted to enter your account password. Enter the password and then close Task Scheduler.
Allow Wake Timers Bring Your PC Out Of Sleep Mode.
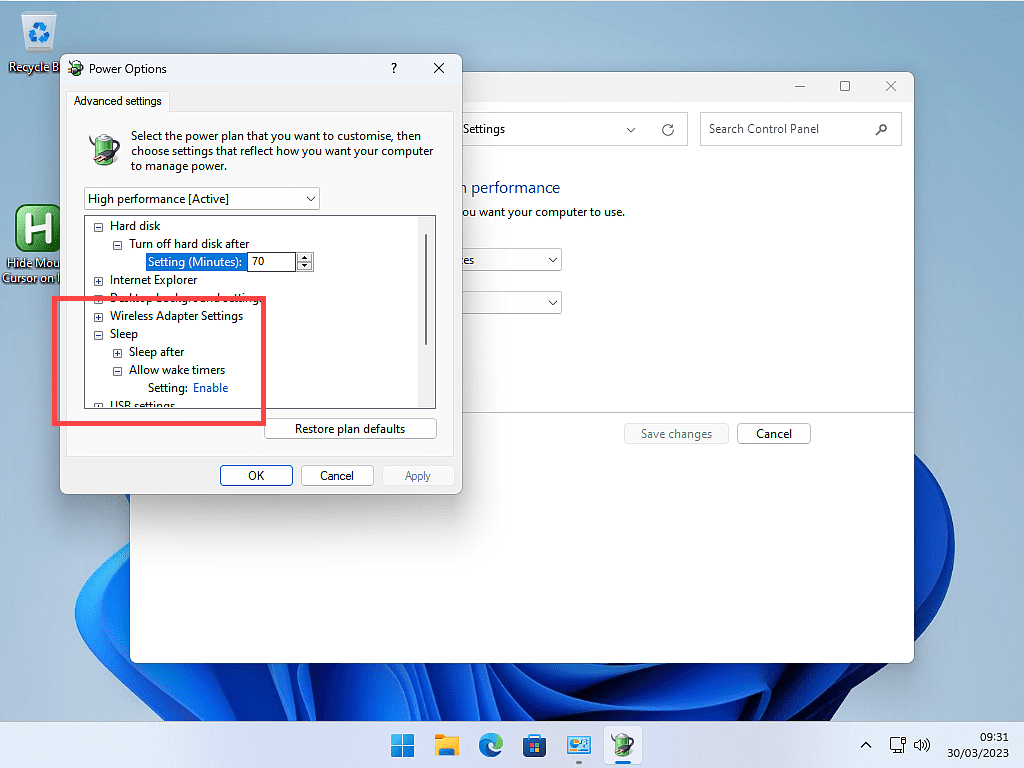
There is just one more job to do. You’ll need to check that your power plan allows the Task Scheduler to run when the computer is in sleep mode.
Click the Start button and the type “edit power plan“. Click on Edit Power Plan (Control Panel).
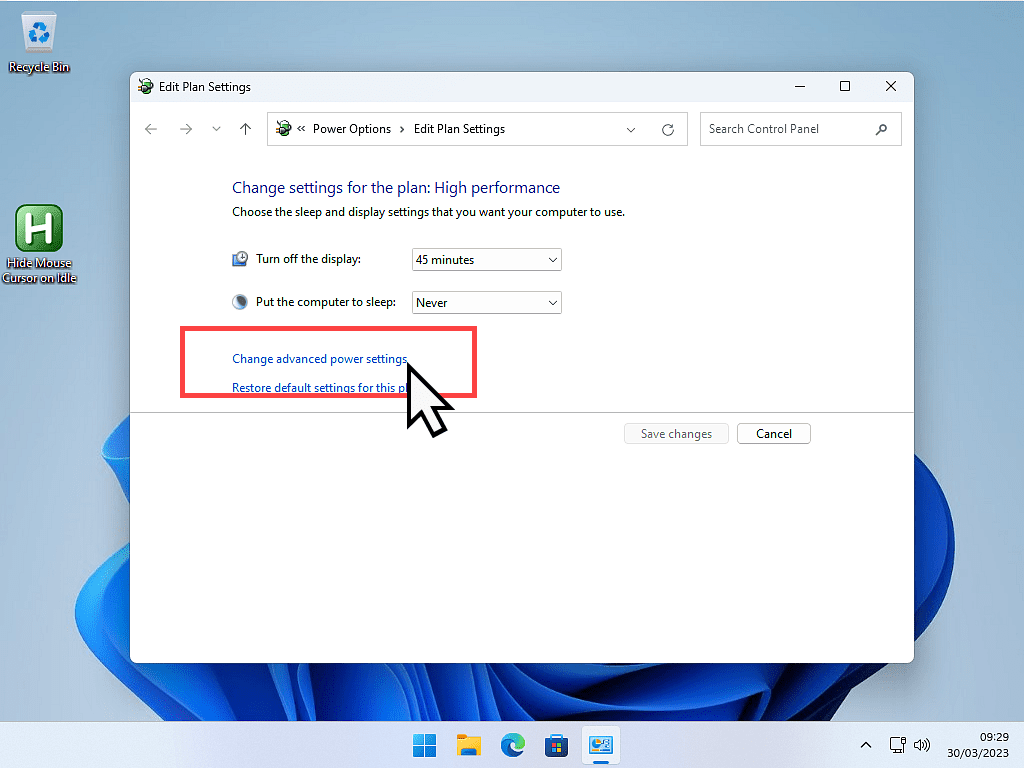
Then click the “Change advanced power settings” option.
On the Advanced Settings window, scroll down and expand the Sleep entry by clicking the + sign. Then expand the Allow Wake Timers entry and select Enabled.
Conclusion.
When using the Task Scheduler to wake up your computer from sleep mode, bear in mind that you might need to change your sleep settings so that it doesn’t just go back into sleep mode before you can get it.
You can also use Task Scheduler to automatically shutdown your computer How To Automatically Shutdown Your Computer At A Specific Time.


