For most of us, the double click speed of the computer mouse is set too high. When you’re trying to open a file or folder, you may find yourself having to have several attempts to get Windows to recognise the double click.
It’s an easy fix. Whether you find the double speed too fast or too slow, you can easily adjust it in both Windows 10 and 11.
How To Adjust The Double Click Speed Of Your Mouse.
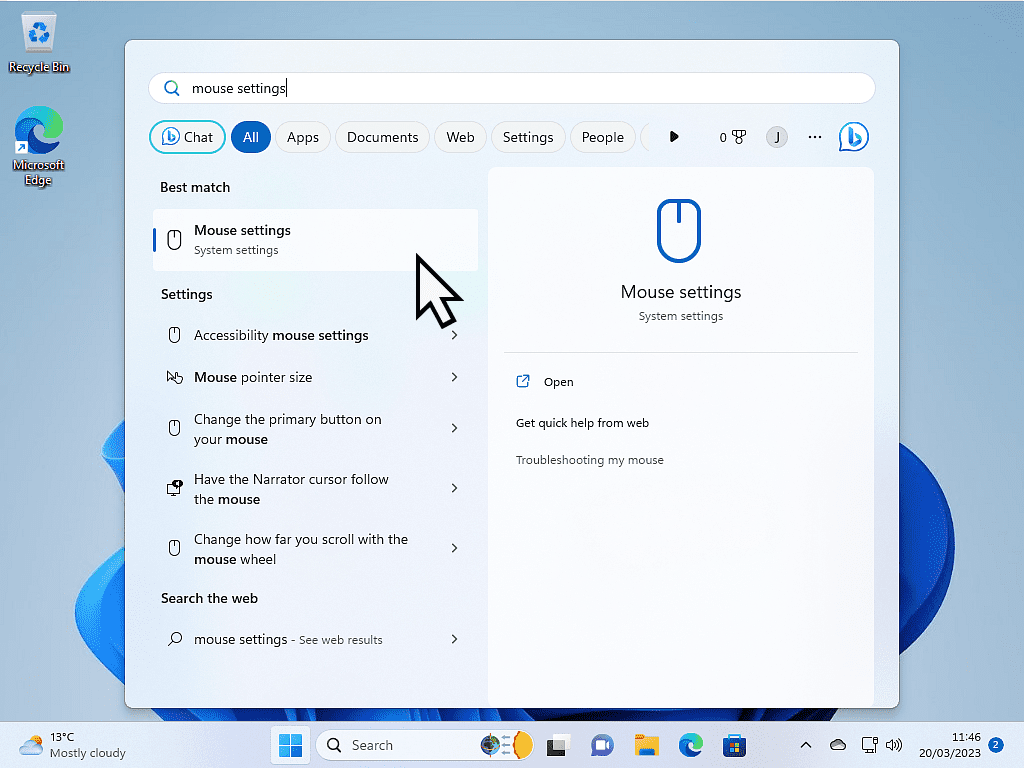
Click the Start button and then type “mouse settings“. Click Mouse Settings (System Settings).
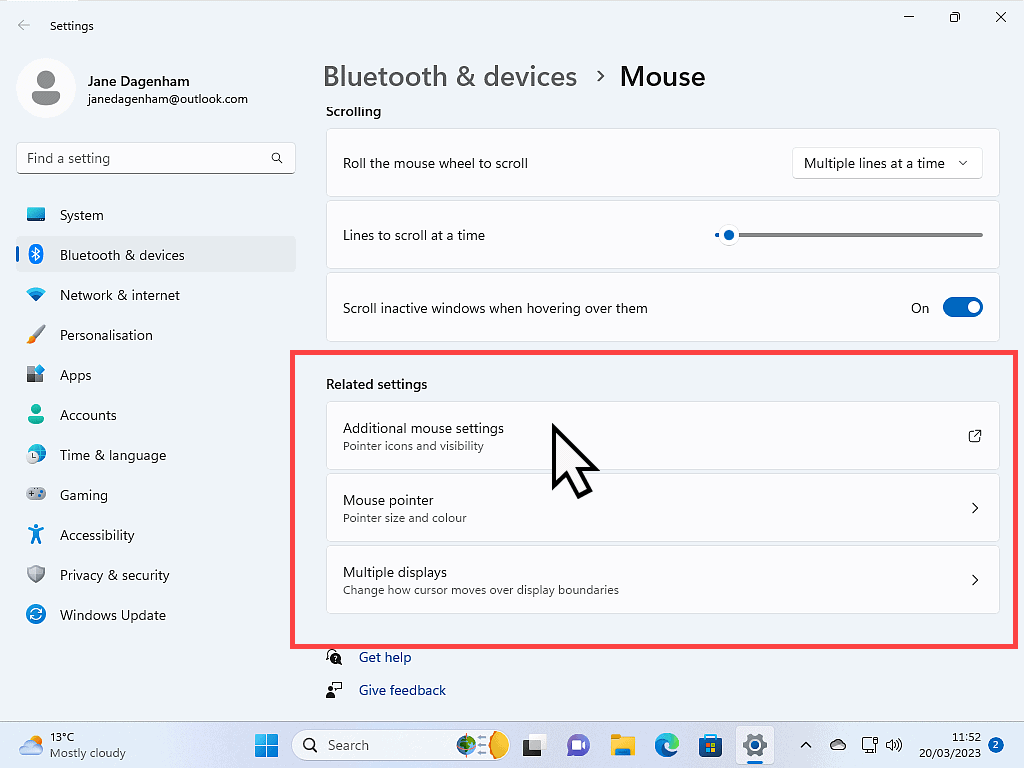
Related Settings.
In the Related Settings section, click Additional Mouse Options (for Windows 10) or Additional Mouse Settings (for Windows 11).
Please note that the Related Settings section can move around a little depending on your screen size. On larger screens, it might appear on the right hand side of the screen. On smaller monitors, you may have to scroll down a little to find it.
Changing The Double Click Speed.
The Mouse Properties box will open. It’s exactly the same in both Windows 10 and 11.
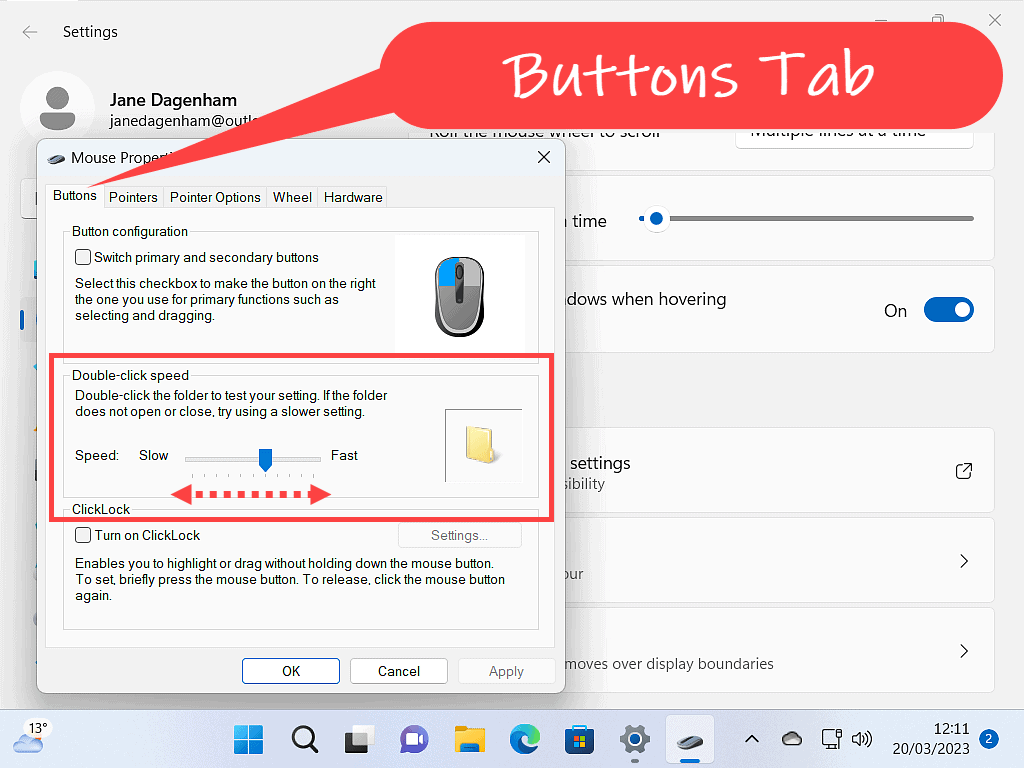
Select (if it isn’t already) the Buttons tab. Then, in the Double-Click Speed section, move the slider left or right to slow down or speed up your double click speed.
If you’d like to, you can test it out by double clicking on the “folder” beside the setting. Personally, I prefer to set it at it’s slowest.
Conclusion.
Slowing down the double click speed of your computer mouse will make using your computer easier and more comfortable. It’s a relatively simple adjustment that can be made in just a few steps, and will greatly benefit anyone who’s struggling to get files and folders to open.
The other great thing about it, is that it’s totally reversible. If you don’t like the changes that you’ve made, you can always revert back to the defaults.


