In this guide I’ll show you how to setup file sharing between your Windows computers on your home network.
Once setup, you’ll be able to view, move, delete and edit files on any of your computers from any other computer.
Check Your PCs Are On The Same Local Network.
All the computers that you want to share files between must on the same local network & “identify” that network as a Private Network.
Both Windows 10 & Windows 11 have a habit of identifying any network as Public. This single issue is usually the cause of failed networking attempts.
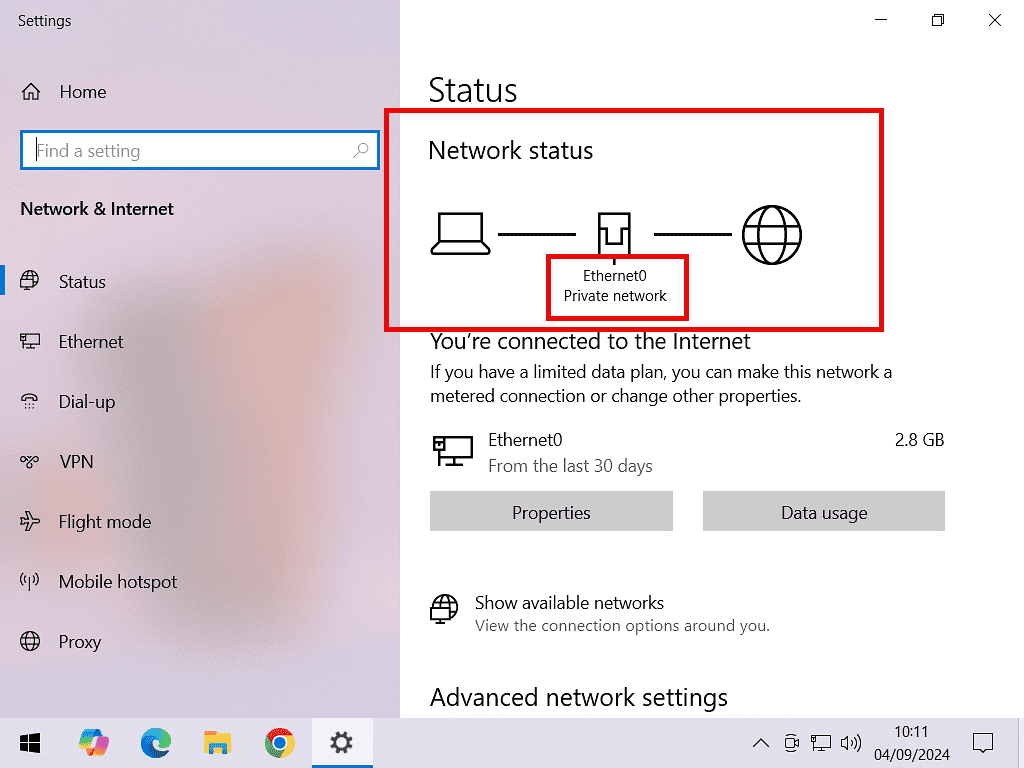
Check the network status of every PC that you’re going to connect.
Windows 10 – Click Start > type “network status” > click Network Status (system settings).
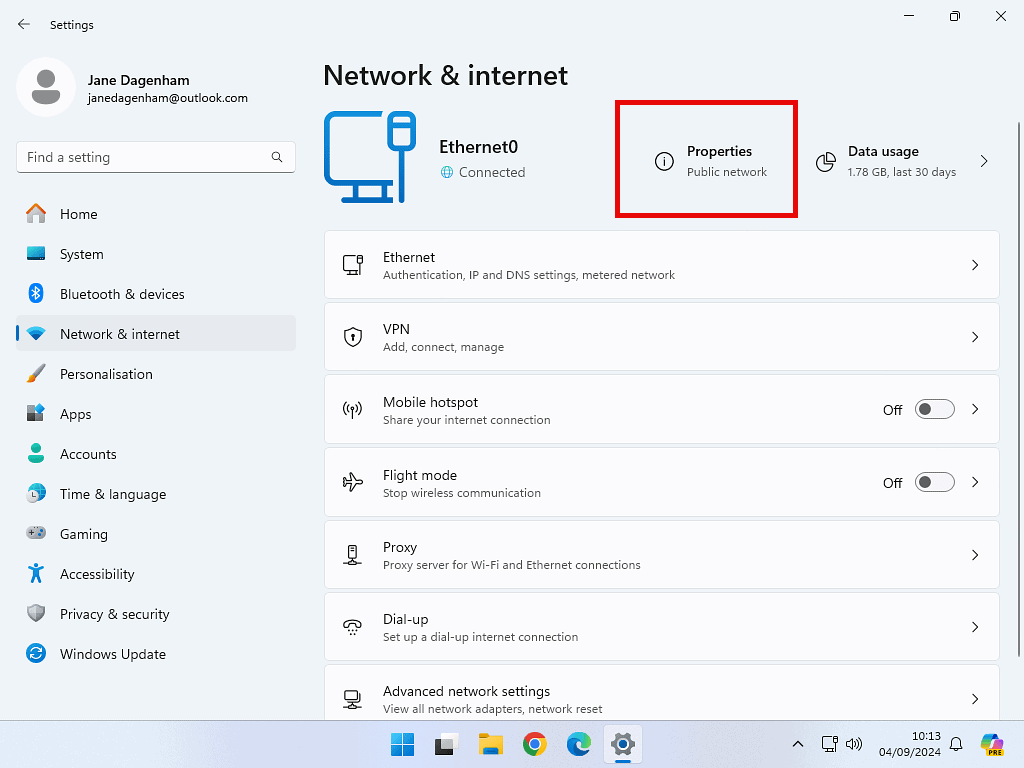
Windows 11 – Click Start > type “settings” > click Settings (app) > click Network and Internet in the left hand panel.
Change The Network Status.
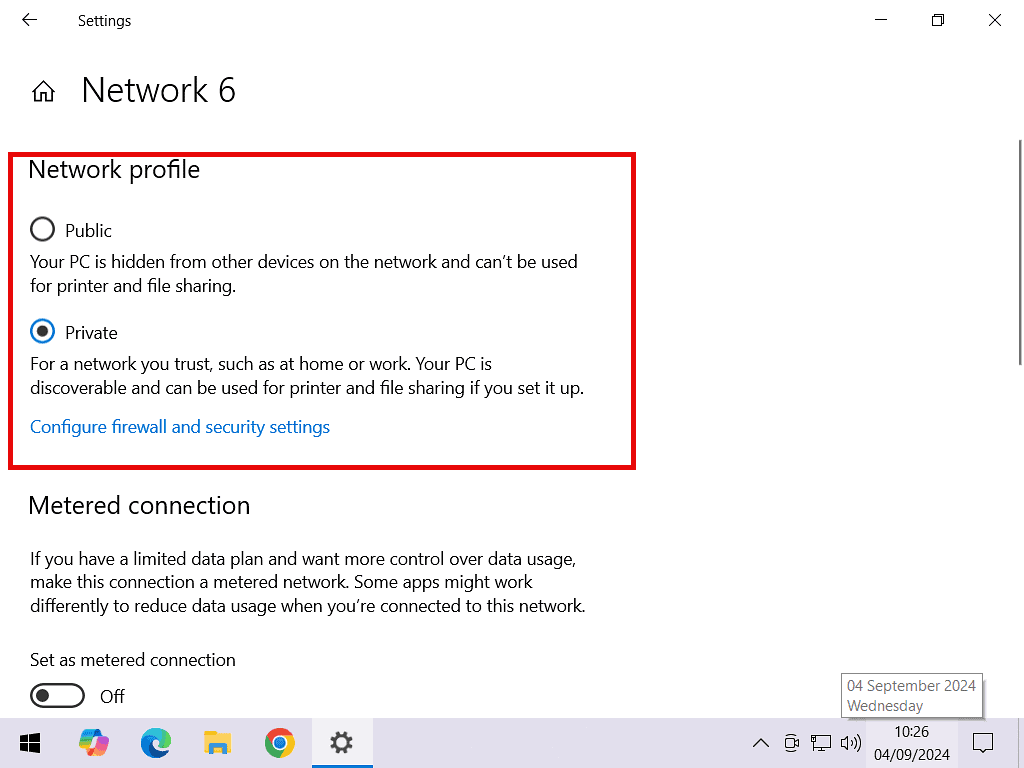
If one or more of your computers has marked your local network as a Public network, you’ll need to change it to be Private before you can start sharing files between your computers.
To change the network status, click the Properties box > then select Private.
Setting Up File Sharing Over A Local Network.
Now you’ll need to make changes to Windows sharing settings. Basically you need to enable it. It’s slightly different depending on whether you’re using Windows 10 or Windows 11.
File Sharing Settings – Windows 10.
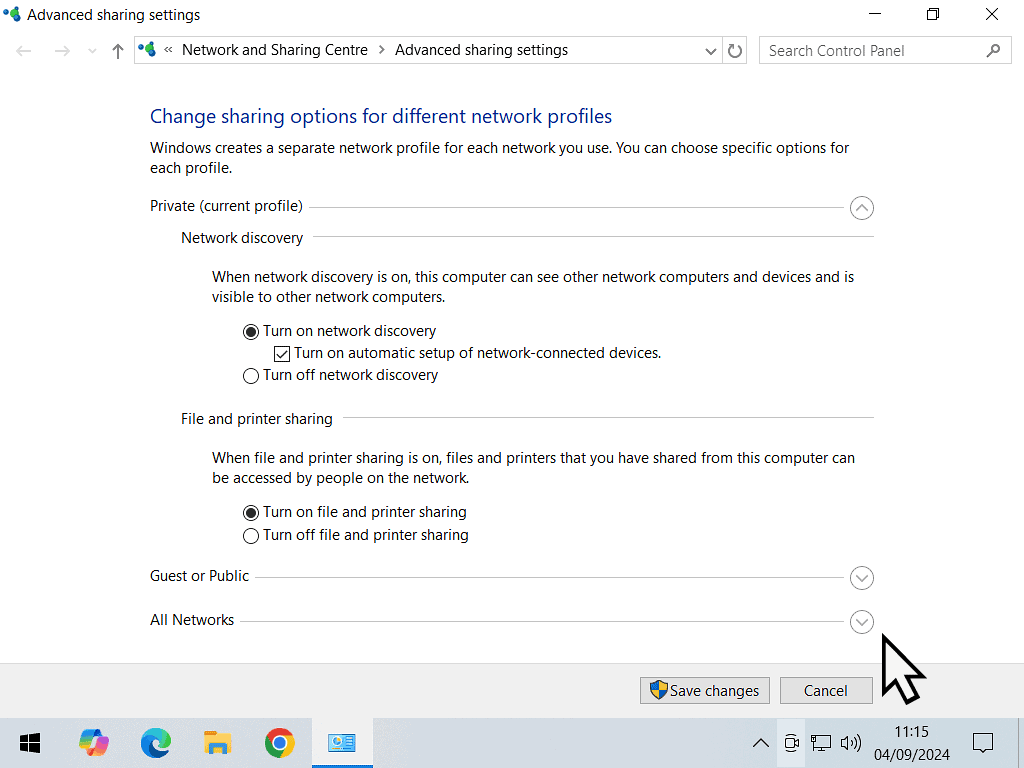
To setup file sharing in Windows 10 click Start > type “manage advanced sharing settings” > then click Manage Advanced Sharing Settings (Control Panel).
On the Advanced Sharing screen, select “Turn on network discovery” and ” Turn on file and printer sharing”.
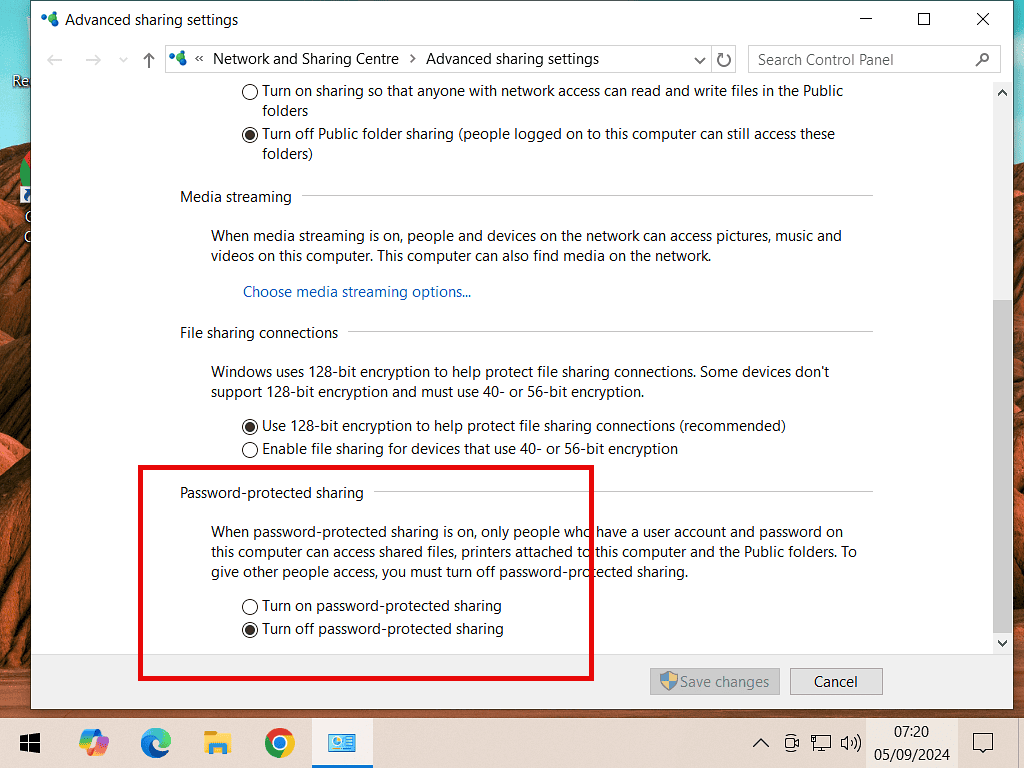
Then expand the All Networks section and select “Turn off password protected sharing”.
Finally for these settings, click the Save Changes button.
File Sharing Settings – Windows 11.
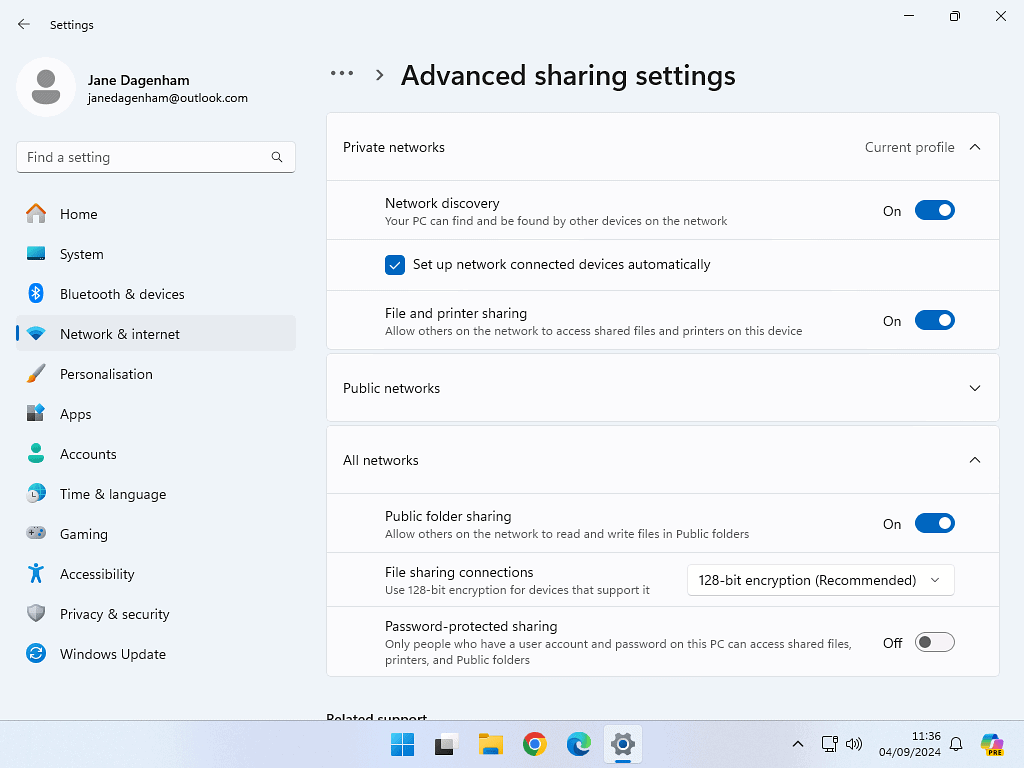
To setup file sharing in Windows 11 click Start > type “manage advanced sharing settings” > then click Manage Advanced Sharing Settings (System Settings).
On the Windows 11 Advanced Sharing screen, turn on Network Discovery and File and Printer Sharing. Also make sure that “Set up network connected devices automatically” is selected.
Then click on the All Networks section. Turn off “Password protected sharing”.
How To Share A Folder Over A Home Network.
That’s all the setting up done. Now it’s time to actually share a folder over your home network. You can share just about any folder on your PC.
To share a folder, right click on it and then left click Properties.
On the Properties dialogue box, click the Sharing tab and then click the Share button.
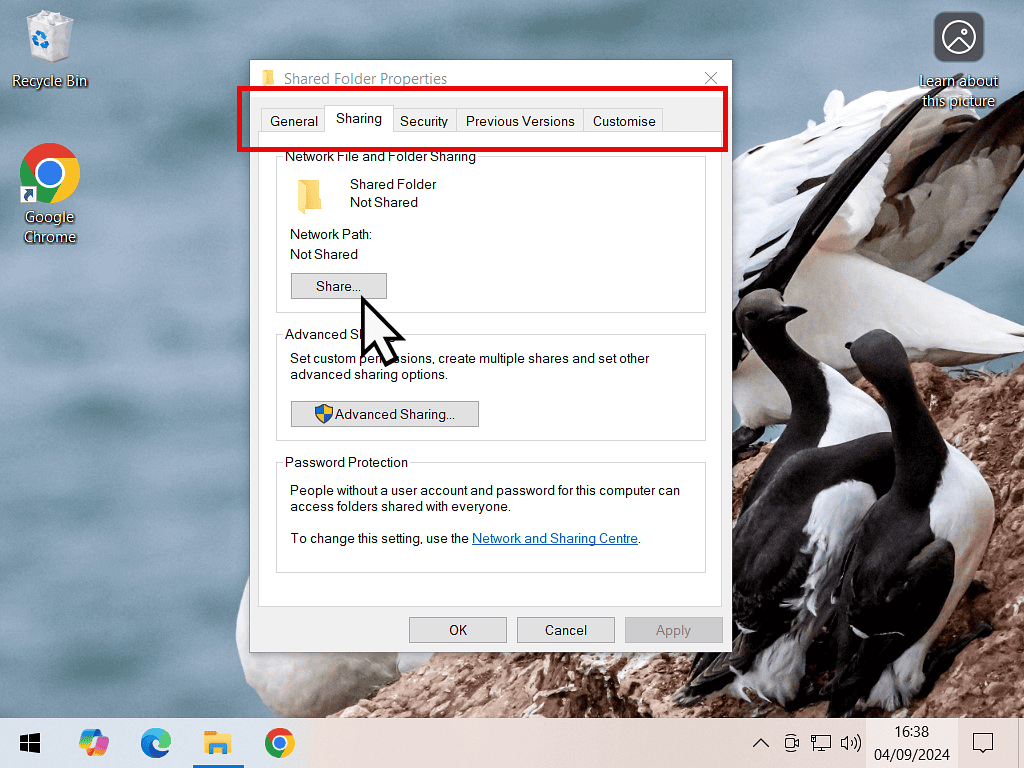
Choose People To Share With.
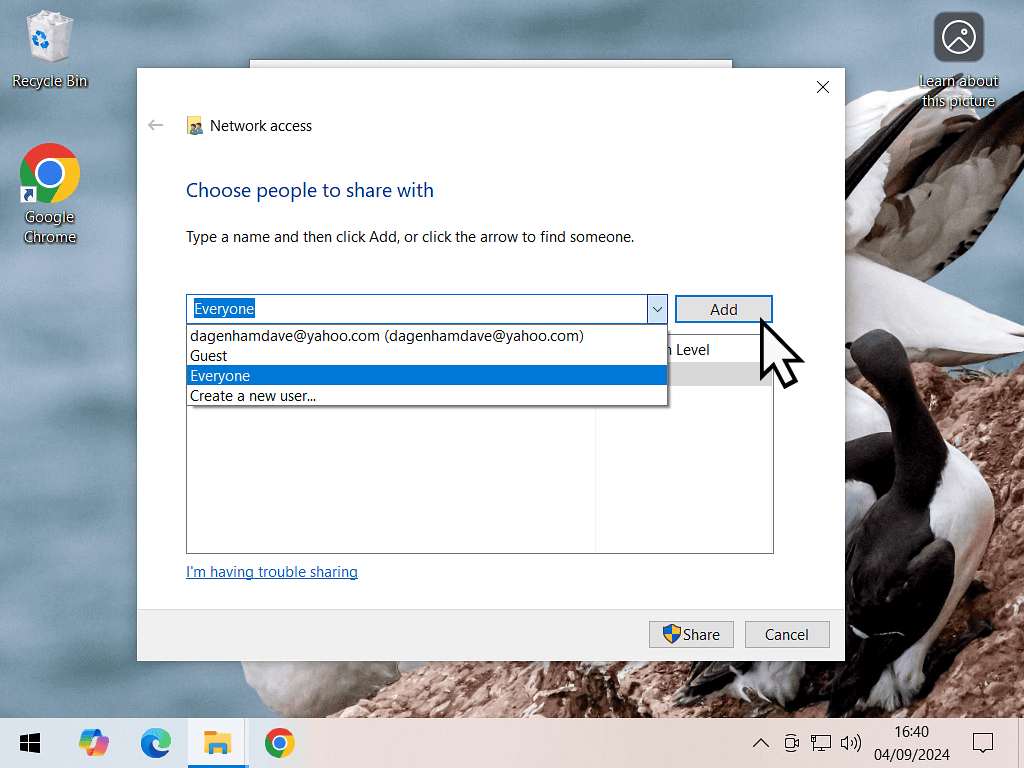
Click on the drop down arrowhead to reveal a list of people to share with. Select Everyone. Then click the Add button.
Note that it’s important to select Everyone first and then click the Add button.
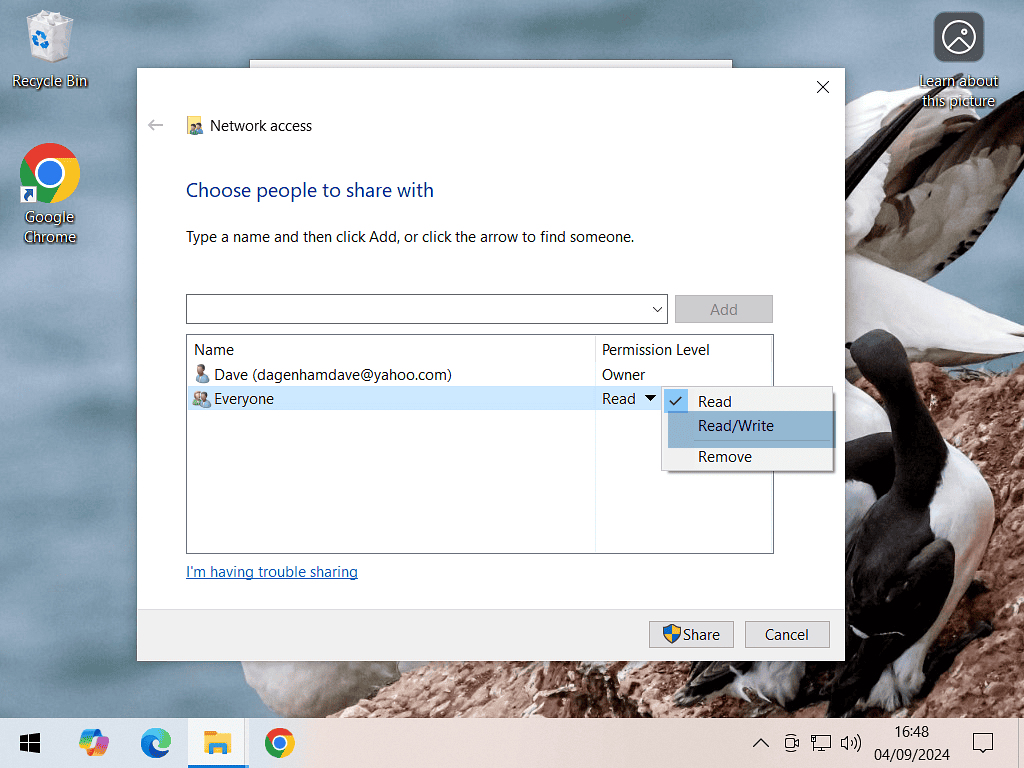
Permission Level.
By default the Everyone user will only have Read permission. Change the permission level to Read/Write if you want to be able to edit any files within the shared folder.
Once that’s done, click the Share button.
If you’re sharing a folder that already has a lot of files stored within it, it might take a few minutes to finish.
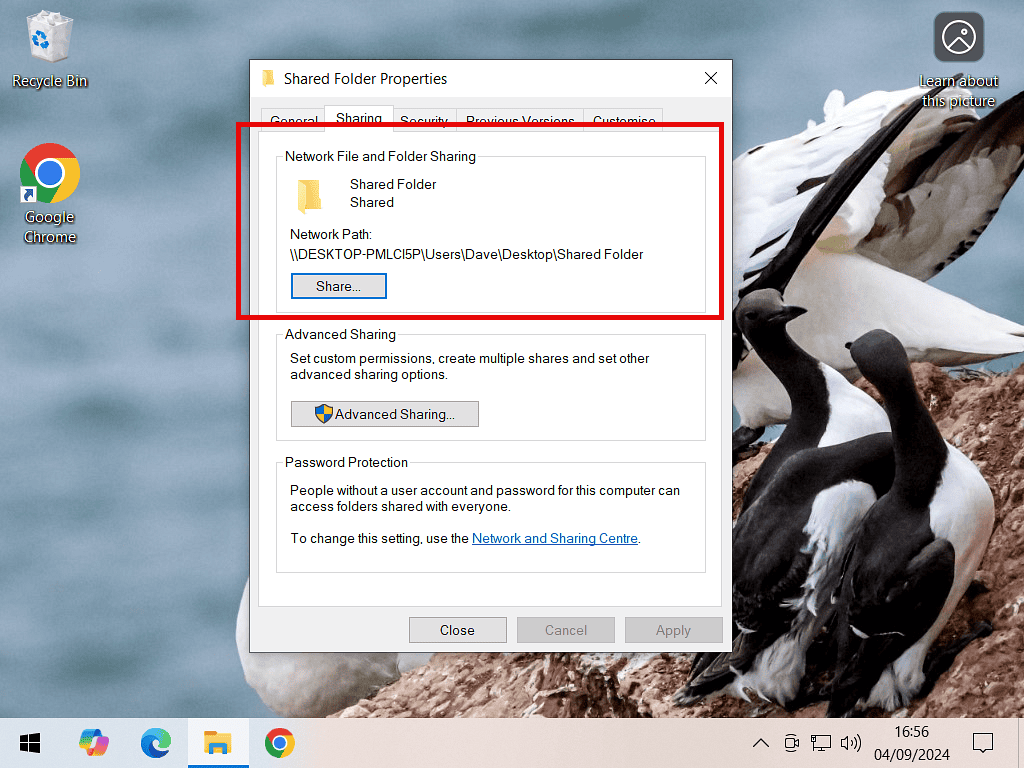
The Folder Is Now Shared.
Close the open windows and return to the folder properties dialogue box. You’ll notice that the folder is now marked as shared.
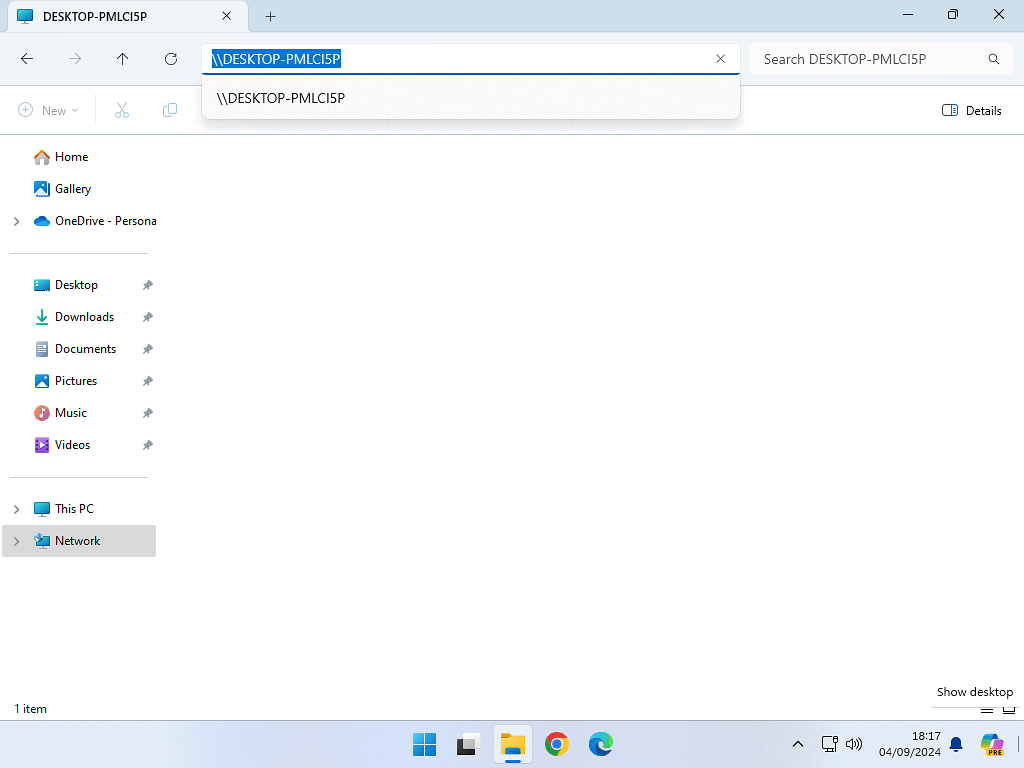
At this point it’s worth making a quick note of the Network Path. When you’re trying to access a folder share from another PC for the first time, sometimes it won’t show up automatically. it should. but sometimes it doesn’t (that’s Windows for you).
Anyway you can get to it by typing in the network path. You’ll only actually need to very first part (it’s the computer name). In this example it’d be \DESKTOP-PKLC15P\
Yours will be different, but just make a quick note in case you need it.
Accessing A Shared Folder Over Your Network.
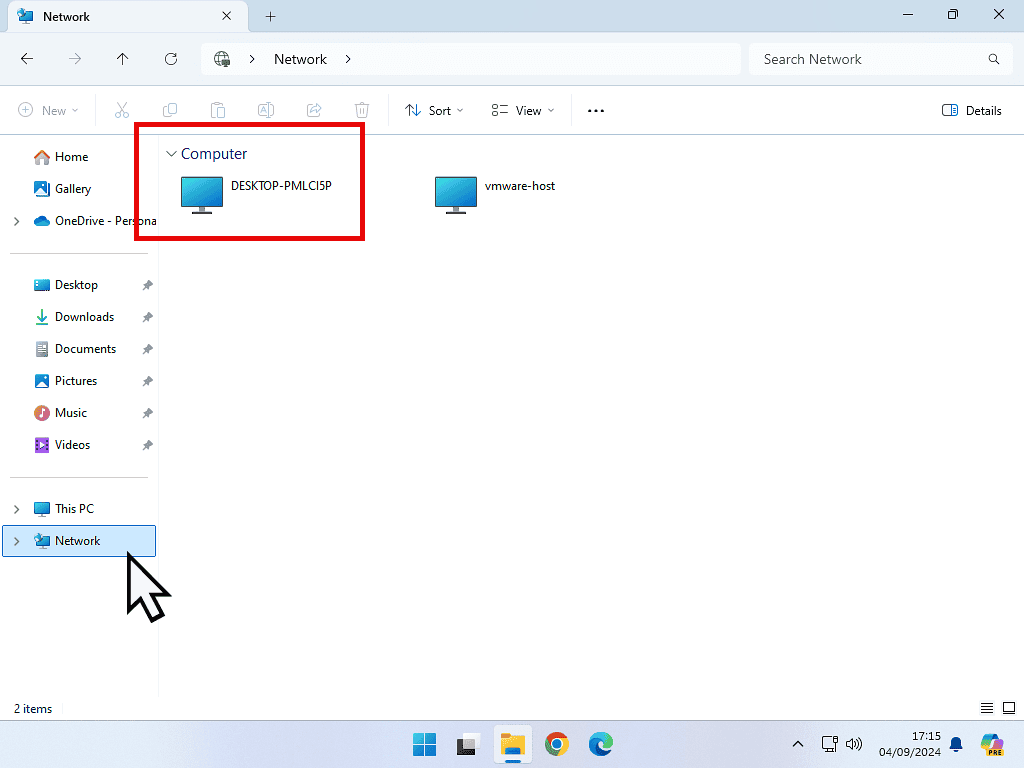
To access the shared folder from a different computer, open File Explorer and then click Network in the Navigation Pane.
You should see the computer on which the shared folder is stored. Double left click your way through all the folders until you reach the one you want.
Create A Shortcut.
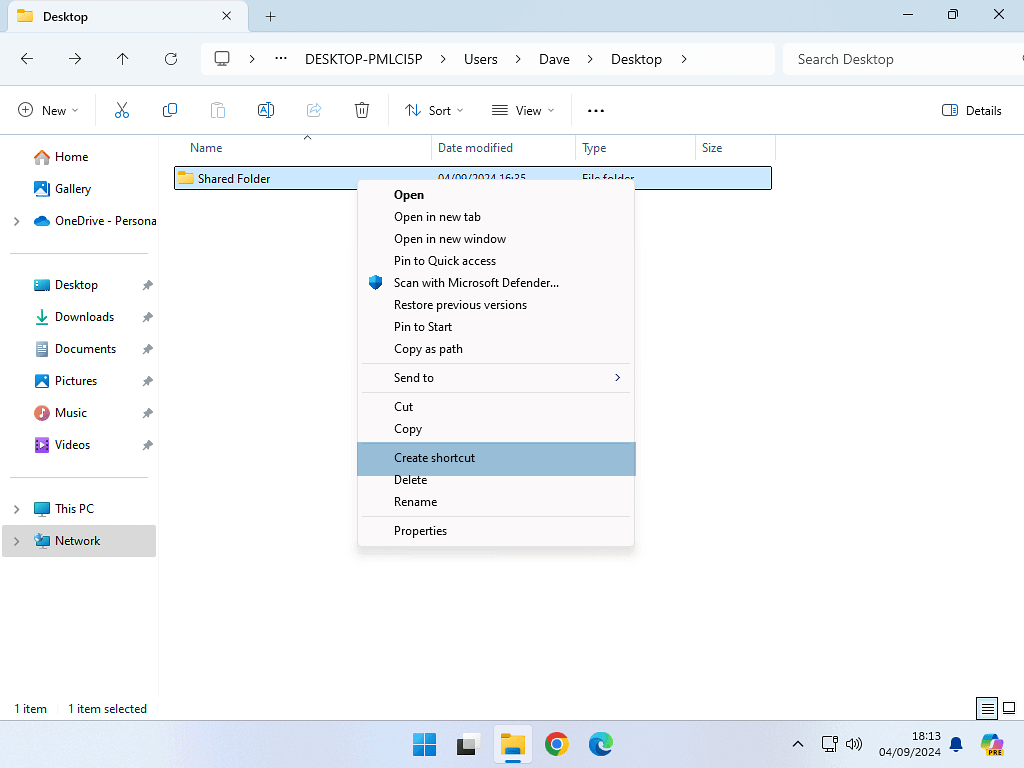
When you find the folder that you’ve just shared, it’s a good idea to create a shortcut to it. The shortcut will be placed on your desktop.
To create a shortcut, right click on the folder, then left click Create Shortcut. If you’re using Windows 11, you’ll probably need to click “Show more options” first.
If You Don’t See Your Shared Folder.
As I mentioned earlier, sometimes when you open File Explorer on the other computer and go to Network, you won’t see the shared folder at all. It just doesn’t show up.
If that happens to you, click into the Address bar and then type in the Network Path that you noted down earlier. Hit Enter on your keyboard and the folder should appear.
Summary.
Sharing files and folders over your local network isn’t always as easy as it should be. But if you follow this step by step guide you should be able to get there.
Sometimes you’ll need to restart your computers to get the settings to take effect.


