BitLocker To Go is Microsoft’s drive encryption software to encrypt data on external hard drives and flash drives.
It can be enabled on a USB drive regardless of whether you’re using BitLocker to encrypt your system drive or not. The one caveat is that it’s currently only available for the Pro versions of Windows. If you have a Home version installed on your PC, then you’re out of luck.
Encrypting An External Drive With BitLocker To Go.
Plug in the external drive that you want to encrypt. It doesn’t matter if it’s a new drive or one that’s got data on it. BitLocker isn’t going to format or wipe the drive in any way. All it’ll do is to encrypt the data (if there’s any there).
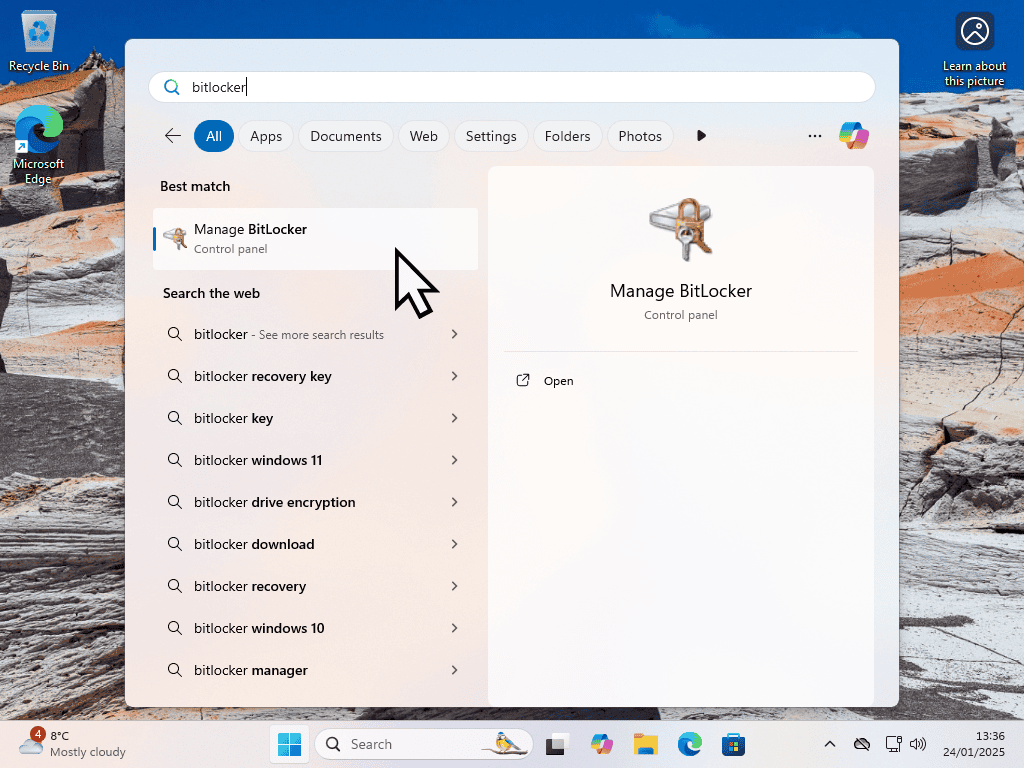
With the USB drive plugged in, click the Start button and then type “bitlocker“. Click Manage BitLocker (Control Panel).
BitLocker To Go.
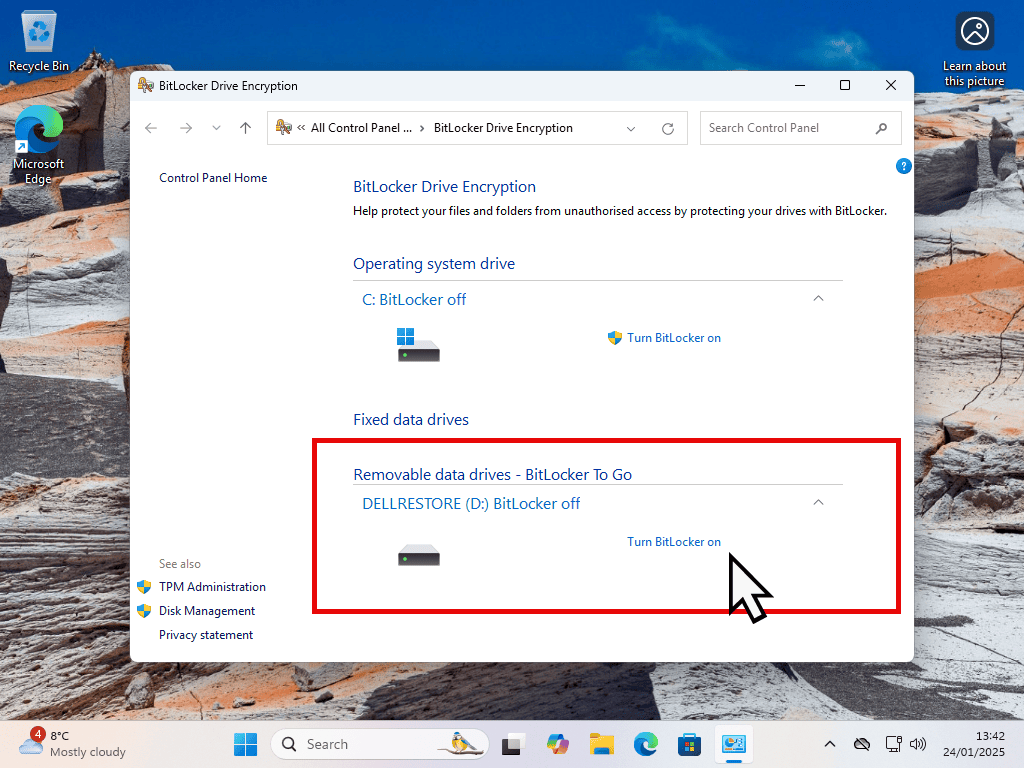
When the BitLocker Drive Encryption screen opens, scroll down to the BitLocker To Go section.
There you should find your external drive. If you’ve got more than one plugged in, make sure you select the correct one.
Select the USB drive and click Turn BitLocker On.
Add A Password.
On the next screen select “Use a password to unlock the drive”. Then type your chosen password into the boxes provided.
Generally I find it easier to have a password ready beforehand. Write it down on a piece of paper or type it into Notepad first. Remember that BitLocker is going to encrypt this drive. Although you will have a recovery key, it’s much better to just know what the password is.
Recovery Key.
The BitLocker recovery key will unlock the external drive if you ever forget or lose the password you set earlier.
The recovery key is a 48 digit numerical password and is unique to each drive. You can save the recovery key to your Microsoft account, to a file on your computer, or print it out.
Whichever you choose to do, make sure you can access it. You just never know when you’re going to need it.
Choose How Much Of Your Drive To Encrypt.
BitLocker To Go can encrypt just the existing files on your USB drive, or the complete drive.
- Encrypt used disk space only – Will only encrypt the files that are on the drive. It will also encrypt new files as and when they’re added to the drive. However any free space on the drive isn’t encrypted.
- Encrypt entire drive – Does what it sys on the tin. Every bit of the drive is encrypted whether it contains data or not.
Which Is Best?
If you’re using a new drive that hasn’t had any files saved ot it begore, then you can save yourself a lot of time by ony encrypting the used space.
On older drives that have probably stored files before, then you may be better off encrypting the whole drive. That’ll prevent anyone from from trying to retrieve data from the unencrypted sectors of the drive.
BitLocker To Go Encryption Mode.
BitLocker has two different encryption modes. New and Compatible. Ideally you’d select the New encryption mode since that’s the most recent and most secure method.
However, since you’re encrypting an external hard drive or maybe a USB flash drive, it’s conceivable that you might want to use the drive in an olde PC.
Windows 7, Windows 8 and Windows 10 prior to version 1511 can’t unlock the New encryption mode. So if you’re intending to use drive on any computer running these operating systems, then you’ll need to select Compatible mode.
Encrypted External Drive.
Finally click the Start Encrypting button and give BitLocker To Go time to complete the job at hand.
When it’s finished, all the data on the external hard drive or USB flash drive will be secure and protected until you enter the unlock password that you created earlier.
Summary.
BitLocker To Go is free (assuming that you have a Pro version of Windows), robust and fairly easy to use. There’s nothing confusing in the setup and in use you simply have to enter the password.
The only thing to note is that there’s no time out on the unlocked drive. Once you’ve you’ve unlocked it, it’ll stay unlocked until you removed it from the PC or restart your computer.

