In this guide I’ll show you how to download a multi edition Windows 7 ISO image file that’s clean and original. The ISO contains the Windows 7 Home Basic, Home Premium, Professional and Ultimate editions.
You’ll need a 16GB USB flash drive and obviously an Internet connection.
Downloading A Windows 7 ISO Image File
To get an original, untouched Windows 7 ISO file, you can use the Dell OS Recovery Tool. This Tool is designed to create bootable Windows 7 flash drives for use with older Dell PCs that originally shipped with Windows 7.
In short, it’ll download a Windows 7 multi edition ISO file from Dells servers, create the flash drive and then delete the ISO file it just downloaded,
To get around that, you’ll need to grab a copy of the Windows 7 ISO and paste it into another folder before the Recovery Tool deletes it. Easy.
Download The Dell OS Recovery Tool.
Download and install the Dell Recovery Tool. Incidentally you don’t have to be using a Dell computer, it really doesn’t matter what make of PC you’re using.
https://www.dell.com/support/home/en-uk/drivers/osiso/recoverytool/W732
Download and install the Tool. Then launch it from the desktop shortcut.
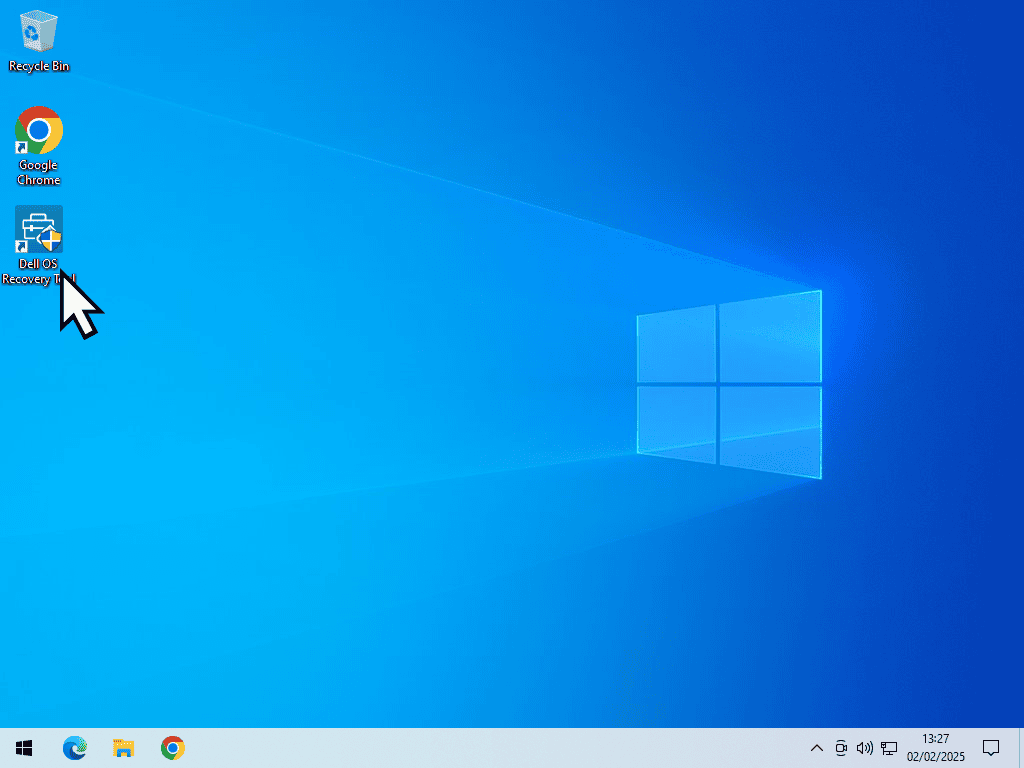
Setting Up To Download A Windows 7 ISO.
This is going to take a little bit of setting up.
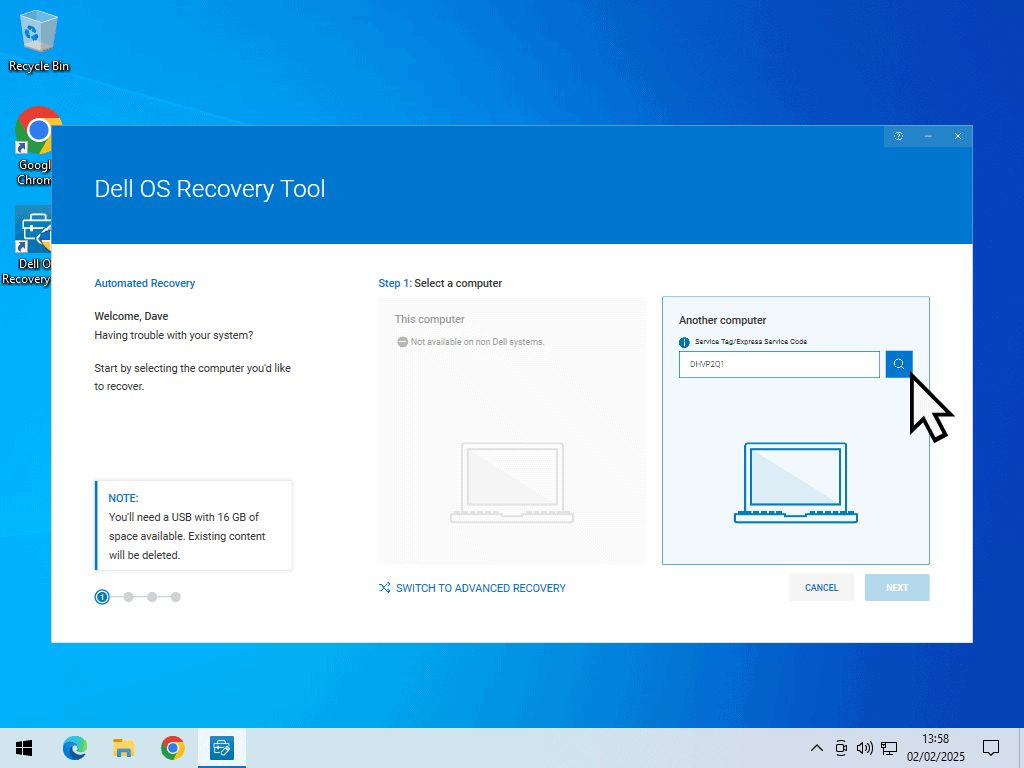
The Recovery Tool requires you to enter a Service Tag number. If you don’t have a service tag available to you, you can use one of these.
Windows 7 32 bit ISO – DHVP2Q1 or 5Y9JKV1
Windows 7 64 bit ISO – DWK6PS1 or 5G5SNS1
Enter the service tag and then click the search icon. When the Recovery Tool finds the correct PC, click the Next button.
Select A USB Flash Drive For Windows 7.
The Recovery Tool is an automated process that will produce a bootable USB flash drive with the Windows 7 setup files on it.
Even if you don’t actually want a flash drive, you have to go through the process otherwise the Tool won’t work.
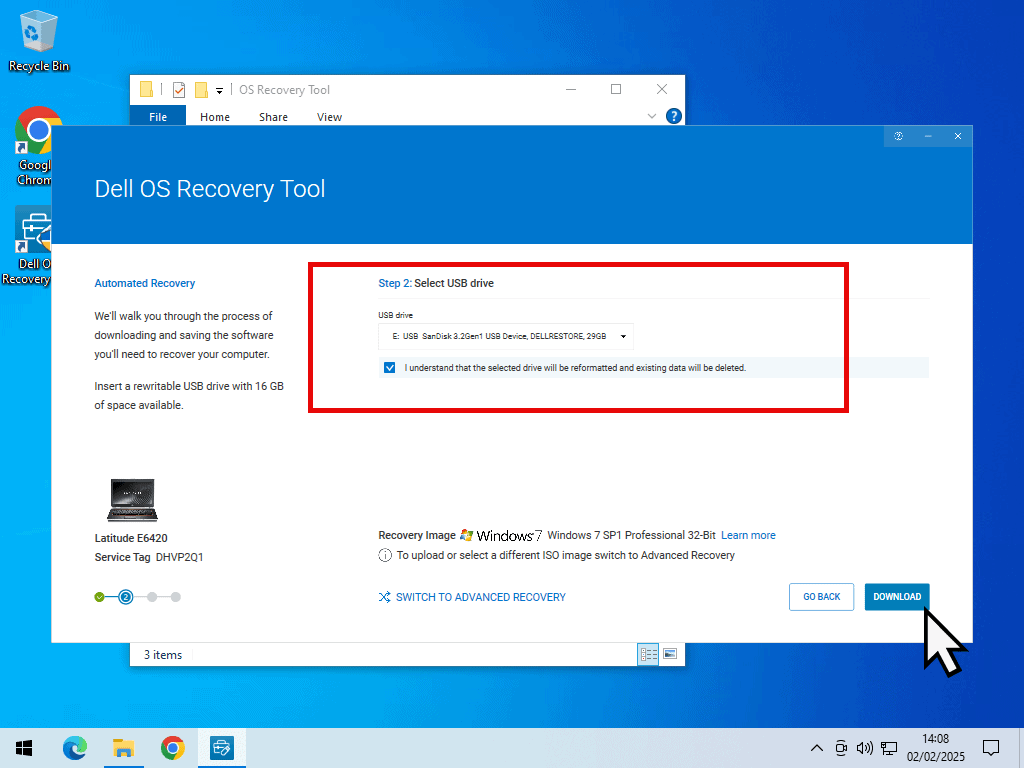
Plug in the USB drive and then select it from the drop down menu in the Recovery Tool.
Check the box “I understand that the selected drive will be reformatted and existing data will be deleted” and then click the Download button.
Copy The Windows 7 ISO Image File.
While the Recovery Tool is downloading the Windows 7 ISO image file, open the folder C:\ProgramData\Dell\OS Recovery Tool\Downloads.
Inside the folder you’ll see another folder named CloudOSRI, which you can ignore.
What you’re interested in is the files that will start to appear as the Windows 7 ISO is downloaded. The Recovery Tool downloads the ISO in multiple parts and then re-assembles them into one large ISO file. That’s the one you need to get a copy of.
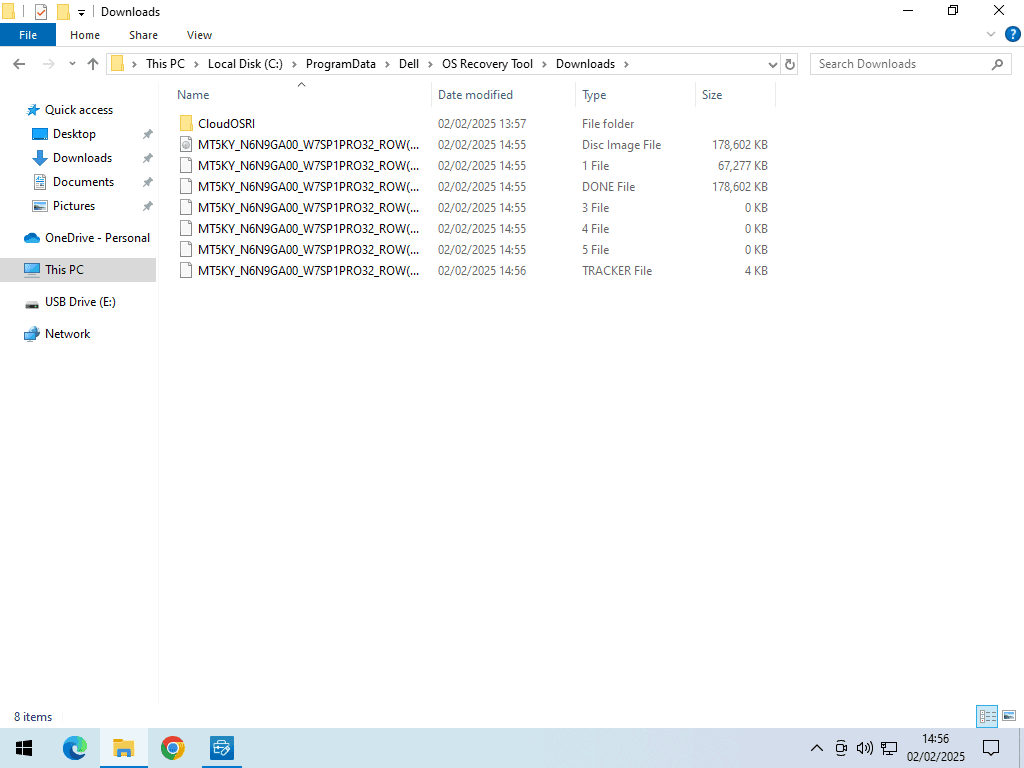
Let the files download. When they’ve all been successfully downloaded, you’ll see them beginning to be merged into a single file.
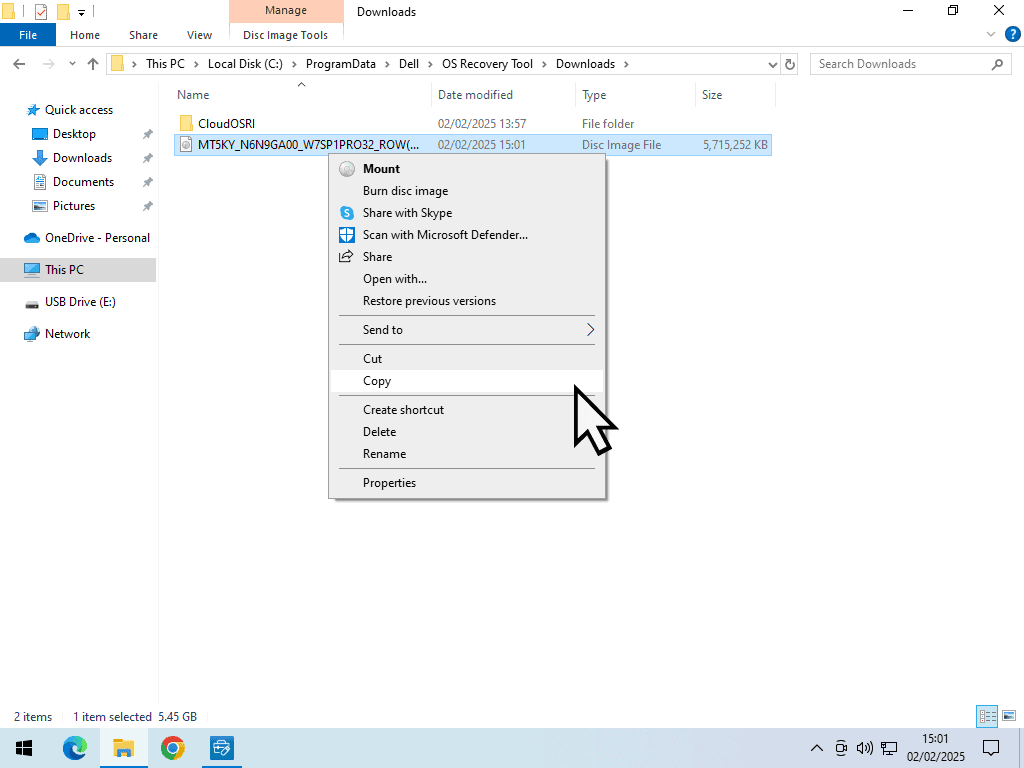
When there is only one file left, copy and paste it to a different folder on your PC. Anywhere will do as long as it’s a different folder.
Bootable Windows 7 Multi Edition Flash Drive.
The Dell OS Recovery Tool will continue working. It’ll create a bootable Windows 7 flash drive and then it’ll delete the Windows 7 ISO file from the Downloads folder (which is why you need to make a copy).
The flash drive can be used to install Windows 7 onto any suitable hardware. However, currently the edition that’ll be installed is set to Windows 7 Professional.
To make the flash drive into a multi edition drive, you need to delete a file called ei.cfg.
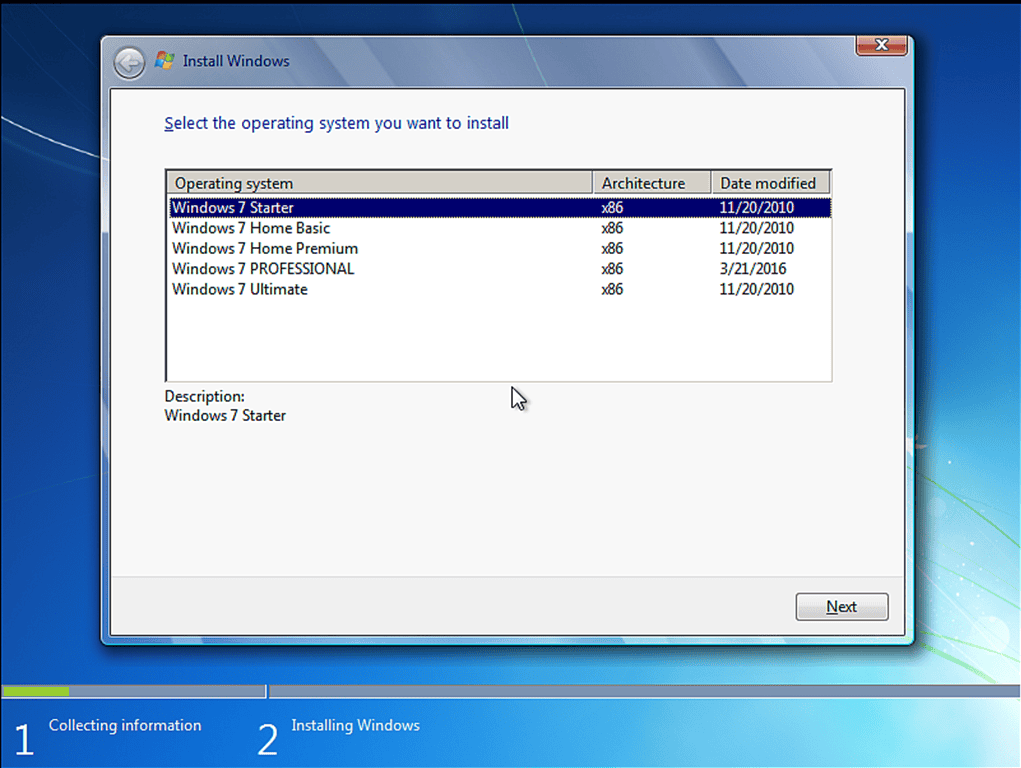
Open the USB flash drive and then open the Sources folder. Scroll down and delete the ei.cfg file. Once that file has been deleted from the USB flash, it’ll allow you to choose which edition of Windows 7 to install (Home Basic, Home Premium, Pro and Ultimate).
Making The Windows 7 Image Into A Multi Edition ISO File.
The same is true for the ISO file that you’ve copied and pasted, it’ll install Windows 7 Pro by default. You have to delete the ei.cfg file from within the ISO to make it into a multi edition ISO.
Editing ISO files isn’t as straightforward as editing files on a USB drive though. You’ll need to have a program that can edit them, any such program will be fine, but if you don’t have one, then you can use the free version of AnyBurn.
https://www.anyburn.com/download.php
If you’re using another program, then it’ll be slightly different, but this is how to edit the Windows 7 ISO file in AnyBurn.
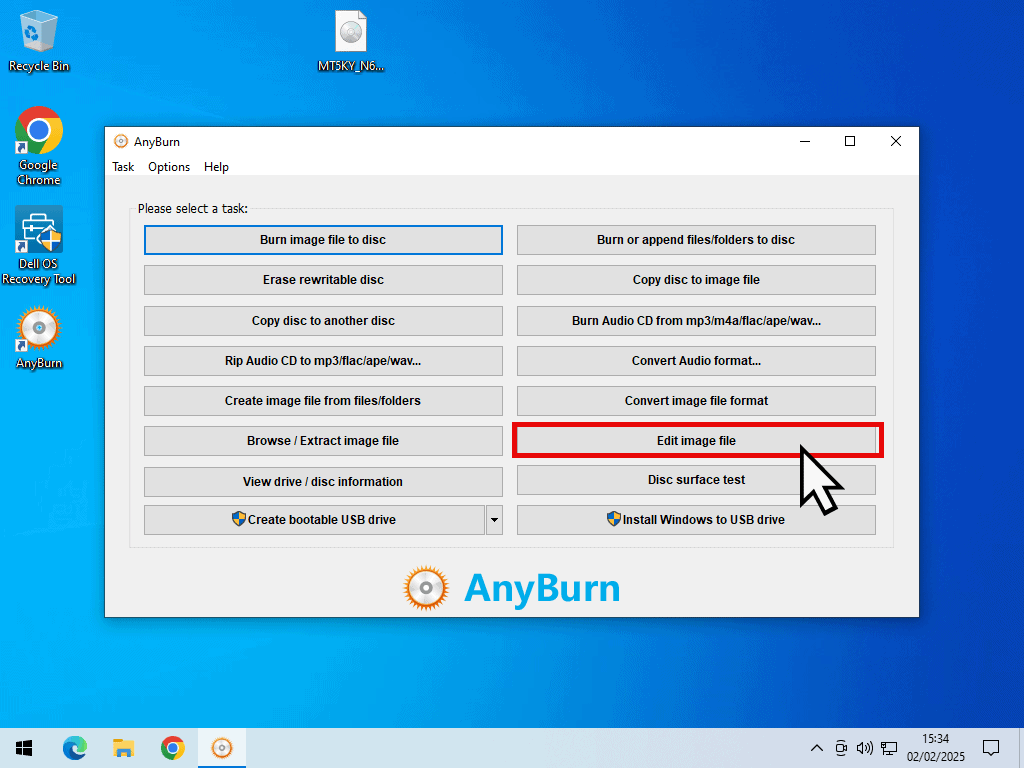
Click the Edit Image File button.
Edit The Image File.
Use the browse button to navigate to and select the Windows 7 ISO file that you copied and pasted earlier. For example, if you pasted it to the desktop, then navigate to the desktop and select the file.
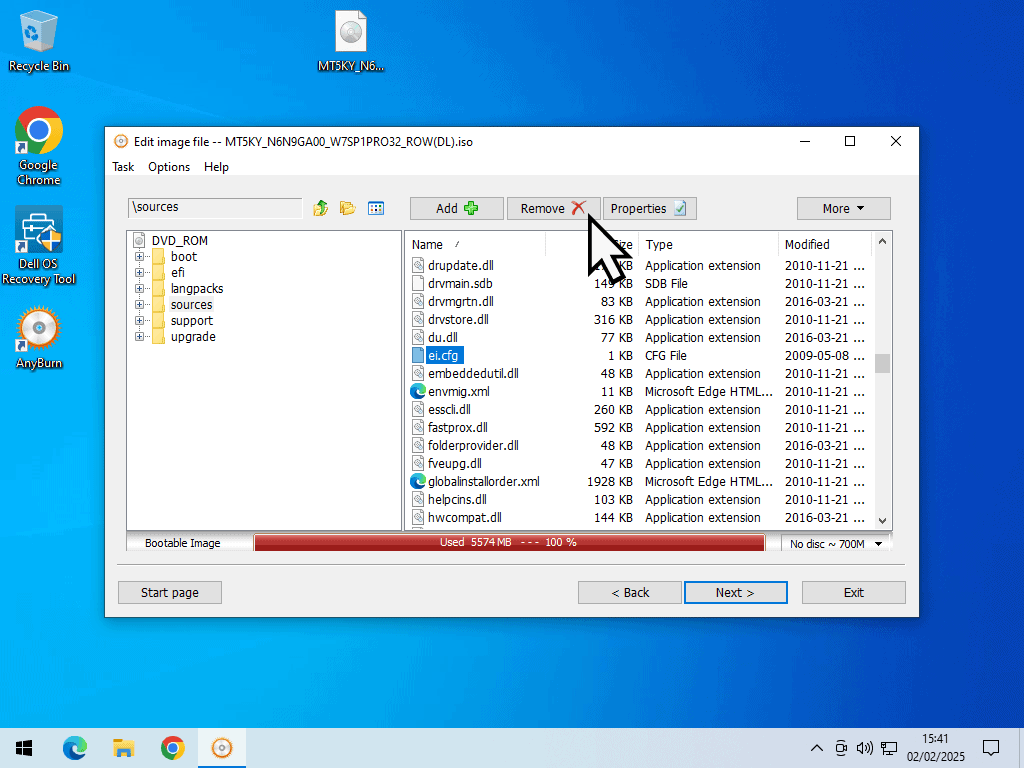
When the ISO file loads, open the Sources folder in the right hand panel.
Inside the Sources folder, scroll down and deleted the ei.cfg file by selecting it and then clicking the Remove button. When the ei.cfg file has been deleted, click the next button.
Rebuild The ISO Image File.
To rebuild the image file and make it work properly as a multi edition ISO, click the Create Now button.
You can rename the file if you want to, or simply overwrite the original.
When the ISO file has been rebuilt, you’ll have a multi edition Windows 7 ISO file that’s perfect for creating virtual machines.
Summary.
Getting hold of a reliable genuine copy of the Windows 7 ISO image is more difficult these days because Microsoft has removed it from its servers.
Although you can download it from various websites, the issue is that of trust. Do you trust them not to have hidden something inside the ISO. It’s a risk whichever way you look at it.
Grabbing a copy from a large reputable company like Dell is, in my opinion, the safest route.
Related Posts.
Install Windows 10 VM On Workstation Pro.
Set up a Windows virtual machine on your home computer. It really isn’t that hard to do.

