Windows 11 computers updated to 24H2 might not be able to access shared resources on your home network. The issue only affects 24H2 machines. All earlier versions of Windows 11 and all versions of Windows 10 are unaffected.
Windows Network Error.
If you’re affected by the problem, you’ll receive a network error message –
Windows cannot access – Check the spelling of the name etc.

How To Fix Windows 11 24H2 Network Issue.
For whatever reason the problem is caused by trying to access a network share that doesn’t have Password Protected Sharing turned on.
With all previous versions of Windows, if you didn’t want to bother with account passwords, you could disable Password Protected Sharing and then access any shared resource on your home network without any problems.
Not any more. With the release of 24H2, you have to have Password Protected Sharing enabled. And that means the accounts on your computers will need to have passwords.
At this point I don’t know whether this is just one of the many bugs in 24H2, or whether it’s a deliberate decision by Microsoft to enforce passwords on Networked computers.
Make 24H2 Access Network Shares.
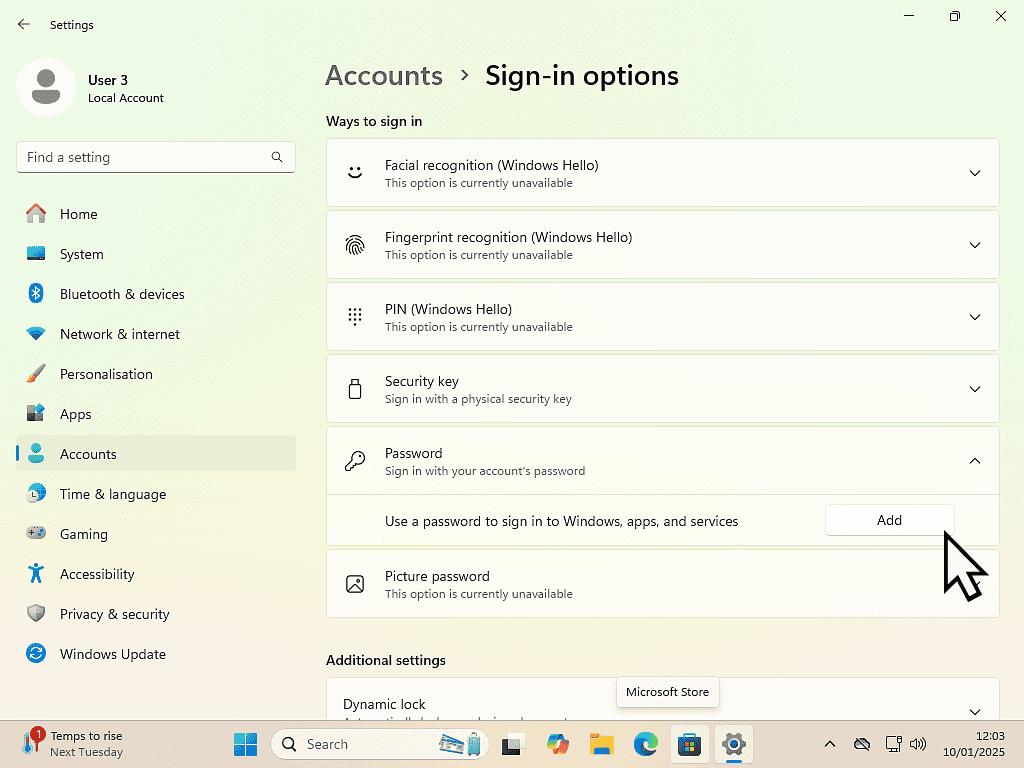
The first thing to do is to add a password to Windows accounts on the devices you’re trying to access.
Microsoft accounts will already have passwords, but even local accounts will need to be passworded if you want to access them over your home network using a Windows 11 24H2 computer.
Enable Password Protected Sharing.
After adding passwords to your accounts, you’ll also need to enable Password Protected Sharing.
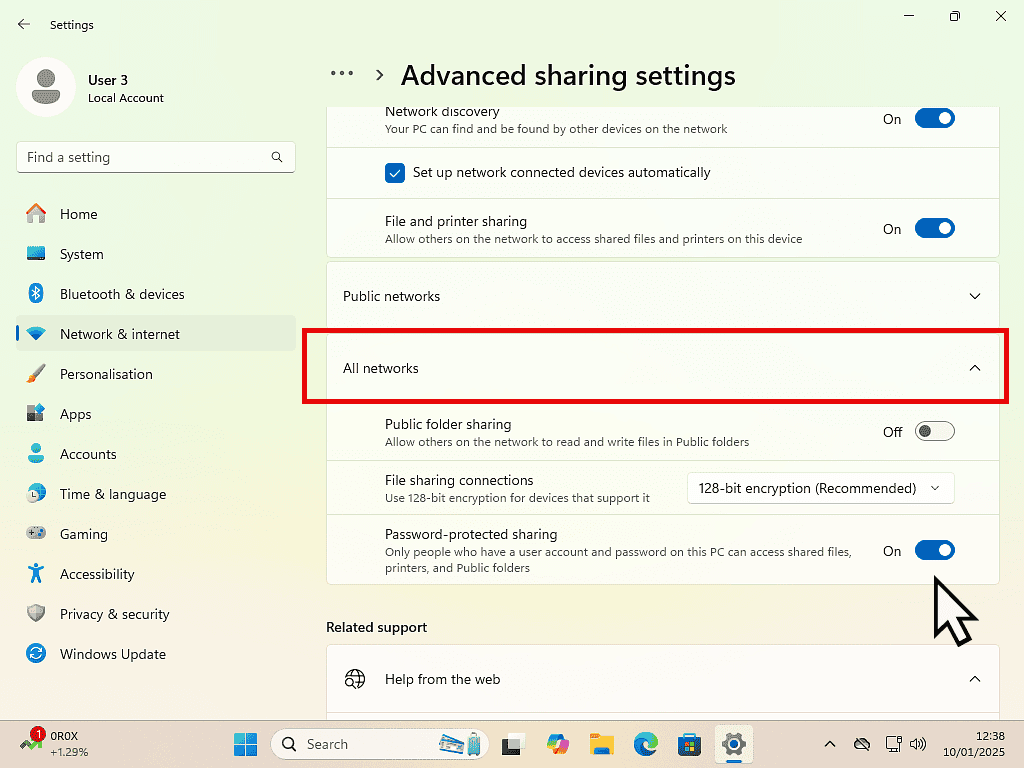
For Windows 11 – Go to Settings > Network & Internet > Advanced Network Settings > Advanced Sharing Settings.
Open the All Networks section (if it’s closed) and then turn on Password Protected Sharing. Reboot your PC and log in with the password that you set up earlier.
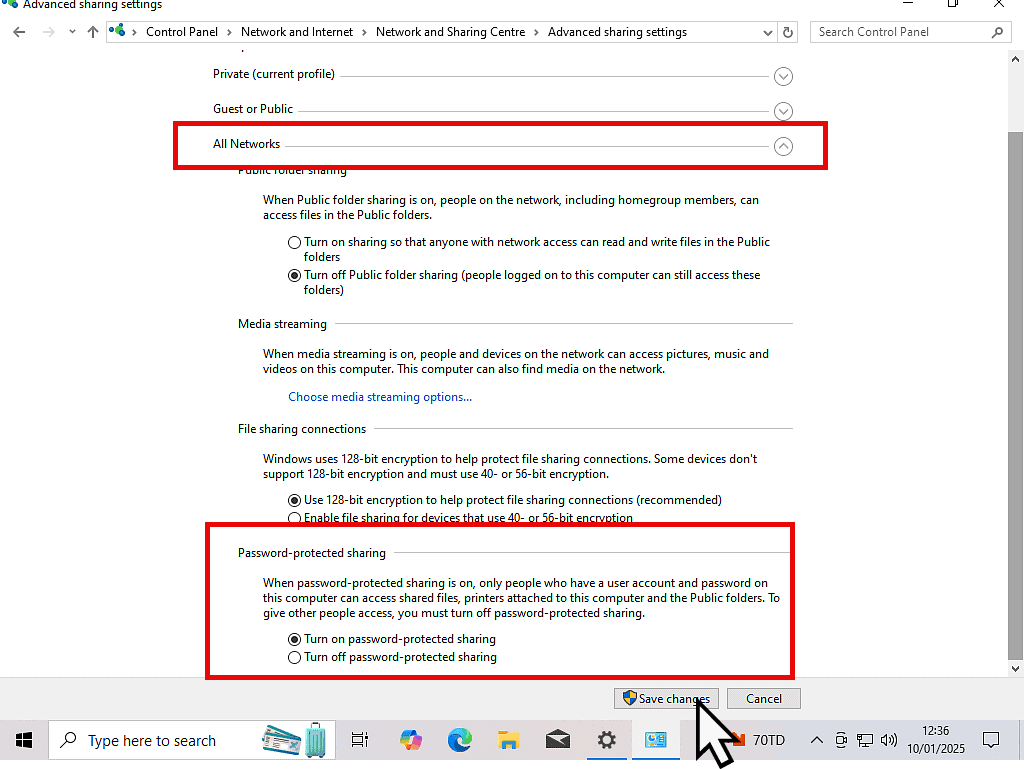
If you’re computer is running Windows 10 – Go to Settings > Network & Internet > Network & Sharing Centre > Change Advanced Sharing Settings.
Then expand the All Networks section and enable Password Protected Sharing. Restart your PC.
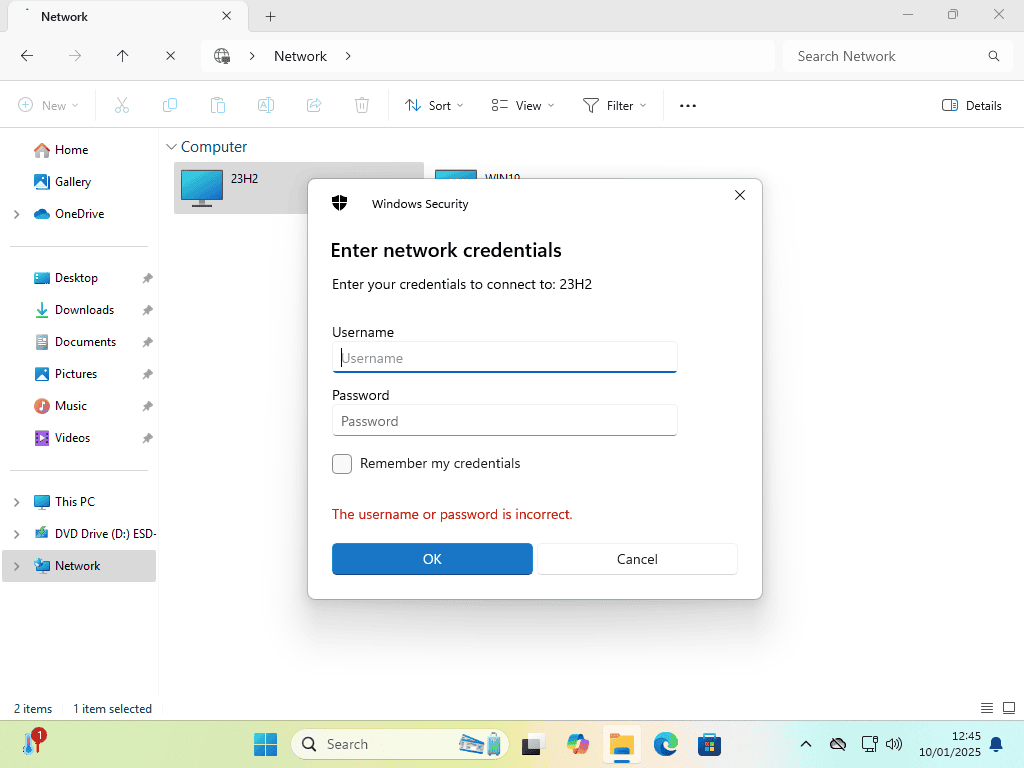
Windows 11 24H2 Enter Network Credentials.
After rebooting your computers, try accessing them over your network from your Windows 11 24H2 computer.
You should see a Windows Security box – Enter Network Credentials.
The network credentials are the username and password for an account on the other computer, the one you’re trying to access.
Local Account – For a local account you just need the username and password.
Microsoft Account – As ever things are different for Microsoft accounts. For the username you’ll need to enter the email address that you used to setup the account and also the password. And no, the PIN that you use to log in to your computer won’t work. It has to be the password.
Summary.
I really don’t know why this networking issue has cropped up with 24H2. All other versions of Windows 11 are happy to share across a home network without the use of account passwords.
If it turns out to be a bug in the system, then we can expect Microsoft to fix it with an update, but if it’s not, then I really don’t like it.

