In this guide I’ll show you how to get Windows 10 installed as a virtual machine using VMware Workstation Pro as the hypervisor.
Windows 10 ISO Image File
To create a Windows 10 virtual machine, you’ll need a copy of the ISO image file. You can download it direct from Microsoft here –
https://www.microsoft.com/en-gb/software-download/windows10
Use the Media Creation Tool to download a Windows 10 ISO to your computer. Workstation Pro will use the ISO file to install the virtual machine.
Installing Windows 10 VM In Workstation Pro.
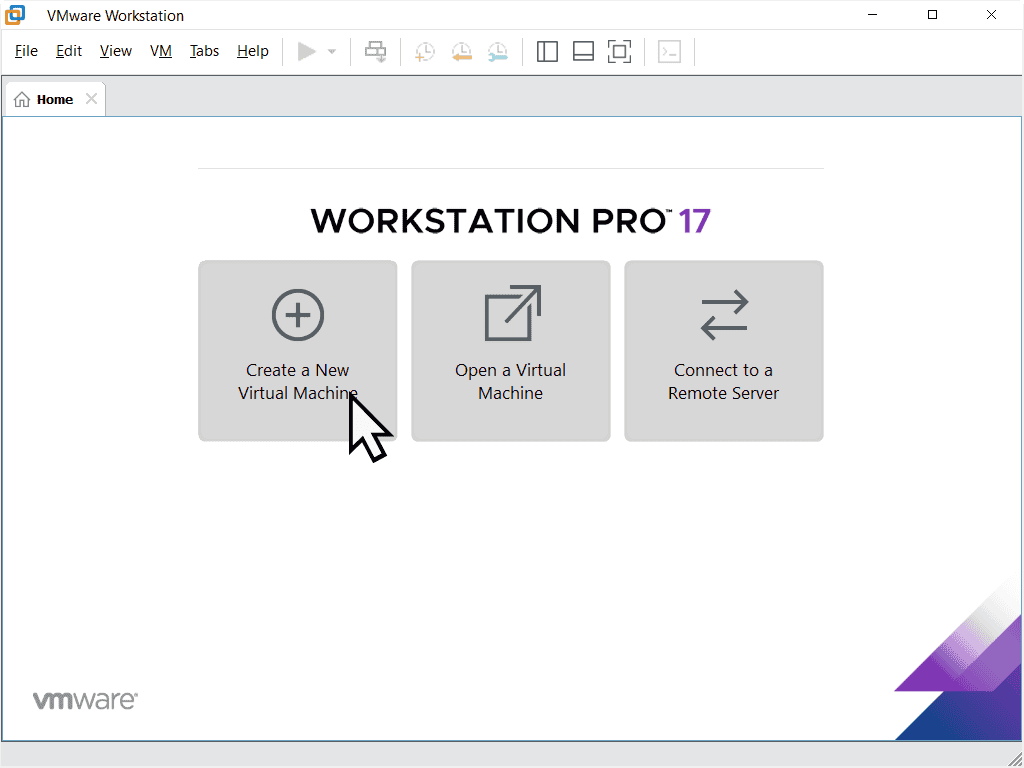
Launch Workstation Pro and click the Create A New Virtual Machine button.
Easy Install Wizard For Windows 10.
Workstation Pro will use what it calls “The Easy Install Wizard” which will guide you through the process of setting up a virtual machine.
On the first screen that appears “Welcome to the New Virtual Machine Wizard”, click the Next button.
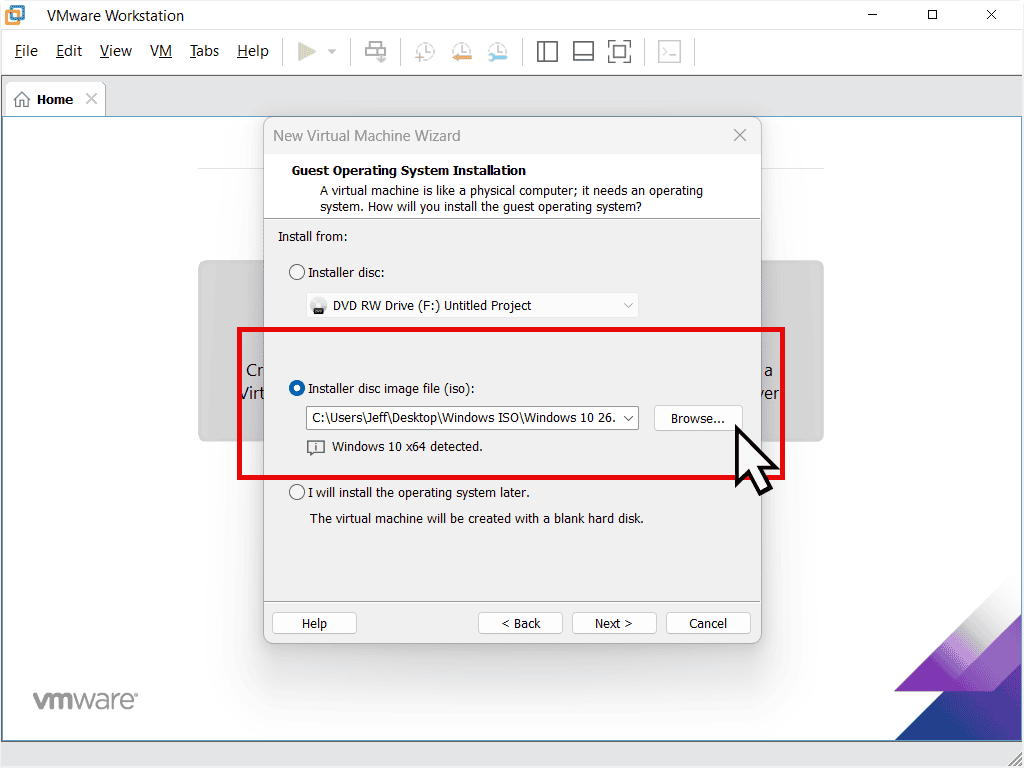
On the second screen, select “Installer disc image file (iso)”, then click the Browse button and navigate to the Windows 10 ISO file you downloaded earlier. Select it. You should see path to the ISO file loaded in the box window. Click Next.
Windows 10 VM Name And Disk Capacity.
The next screen will allow you to give the Windows 10 VM a name. This name is only there so that you can identify the VM in Workstation Pro. If you only intend to have this one virtual machine, then you can probably just leave the name set to the default.
You can also choose a different location for the virtual machine files to be stored. By default Workstation Pro saves the VMs to your Documents folder, but you change that if you prefer. Click Next.
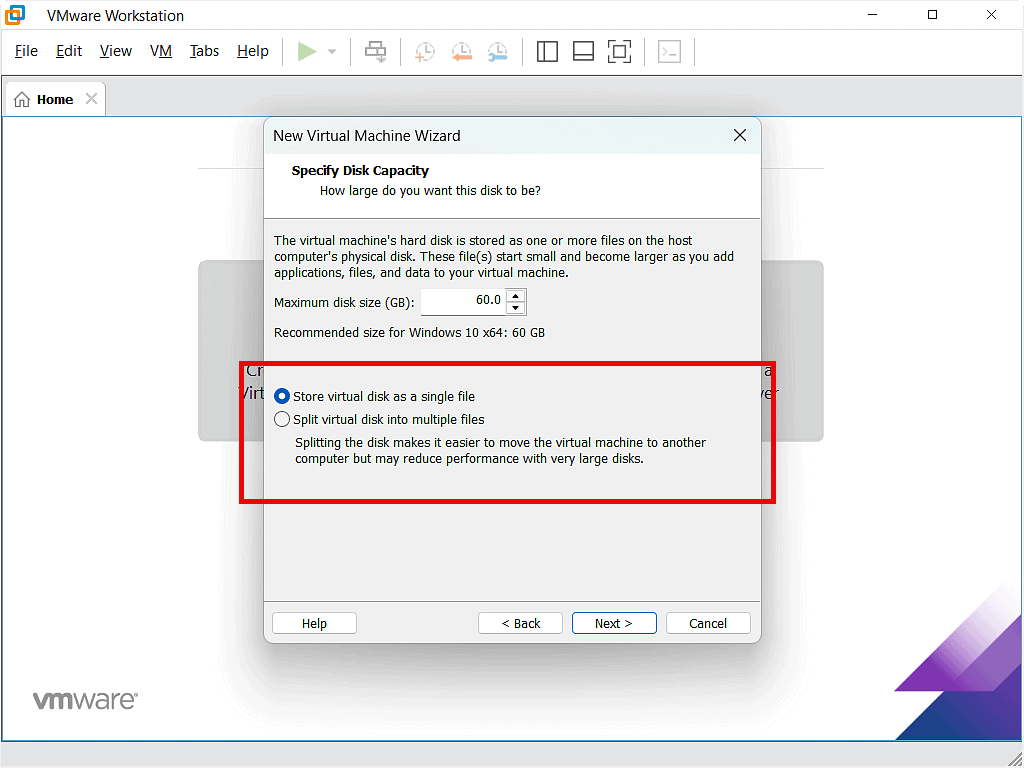
The next screen will ask you to specify the virtual machine disk capacity. For Windows 10 VMs the default is around 60GB. This is a good size to start with and can easily be increased later if required.
The second setting on this screen is more important. Workstation Pro will suggest storing the virtual hard drive as multiple files. I find that changing the setting to store it as a single file improves performance of the VM.
Windows 10 Virtual Machine Settings.
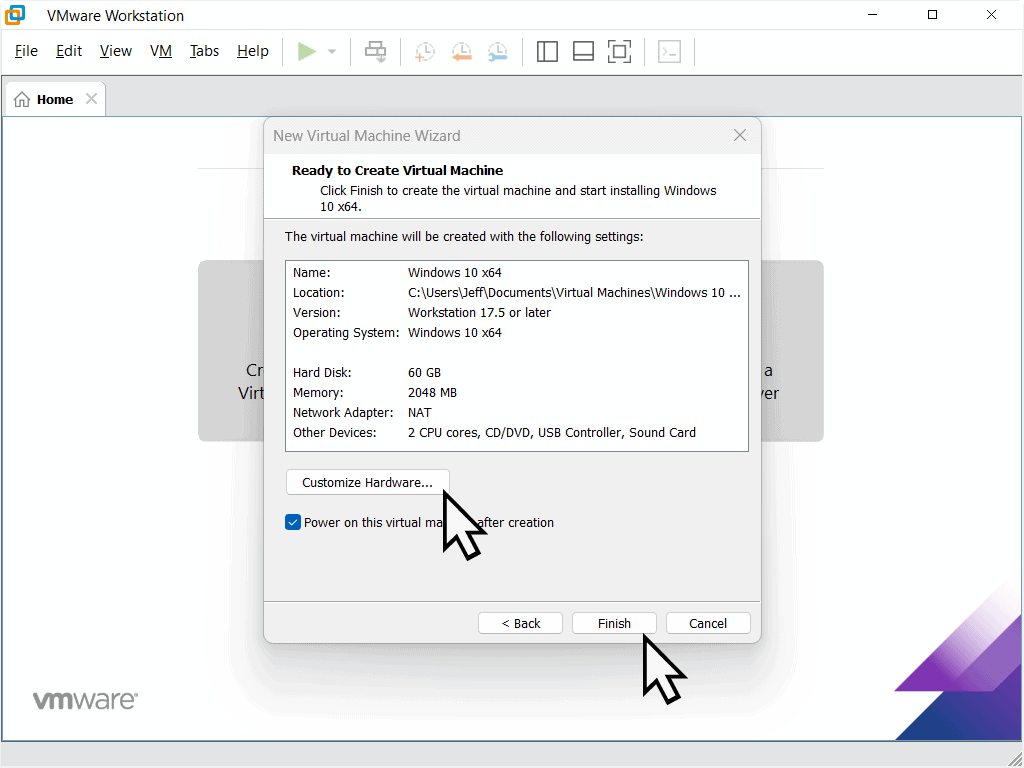
The final screen is really just a confirmation of the settings for the Windows 10 virtual machine.
Workstation Pro will normally allocate 2GB of RAM to Windows 10 VMs. That’ll be OK, but if you wanted to give the VM a little more, click the Customize Hardware button and adjust the Memory accordingly.
Click the Finish button and Workstation Pro will create the virtual hardware and then boot it from the Windows 10 ISO file.
Installing Windows 10.
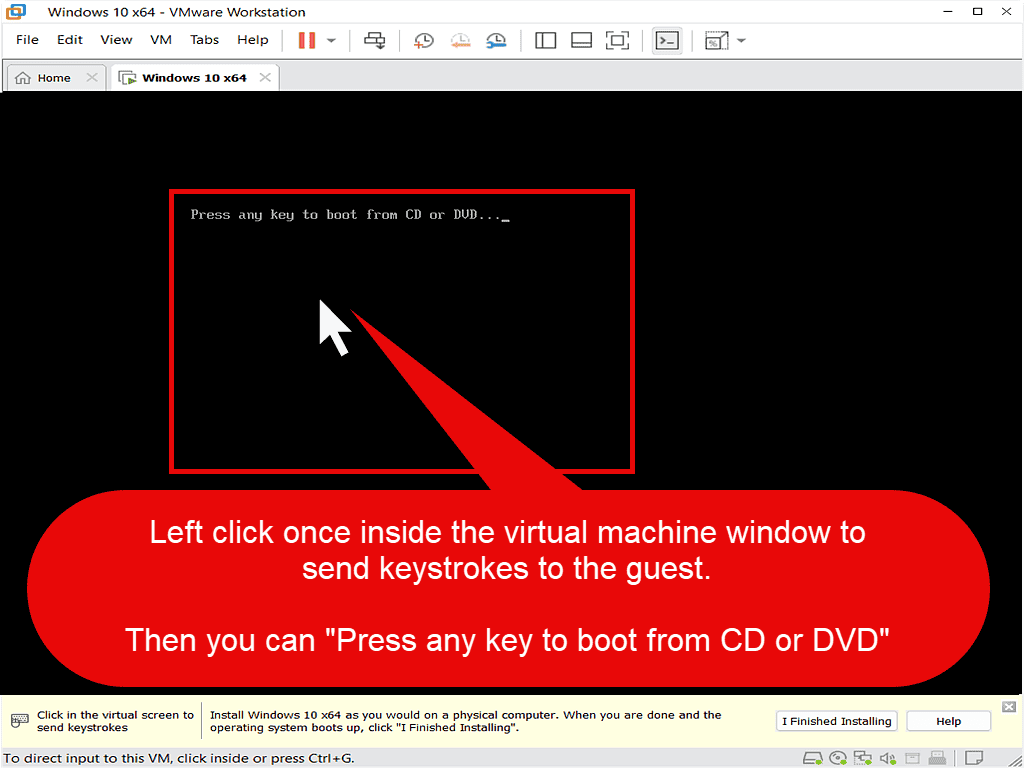
After a few moments you’ll see the familiar black screen and the “Press any key to boot from CD or DVD” message.
In order to send any keystrokes to the virtual machine, you need to left click within the VM window.
To be clear, click inside the black screen, just under the “press any key” message, and then you can hit a key on your keyboard to make the computer boot form the ISO file.
If VM Didn’t Boot From Windows 10 ISO.
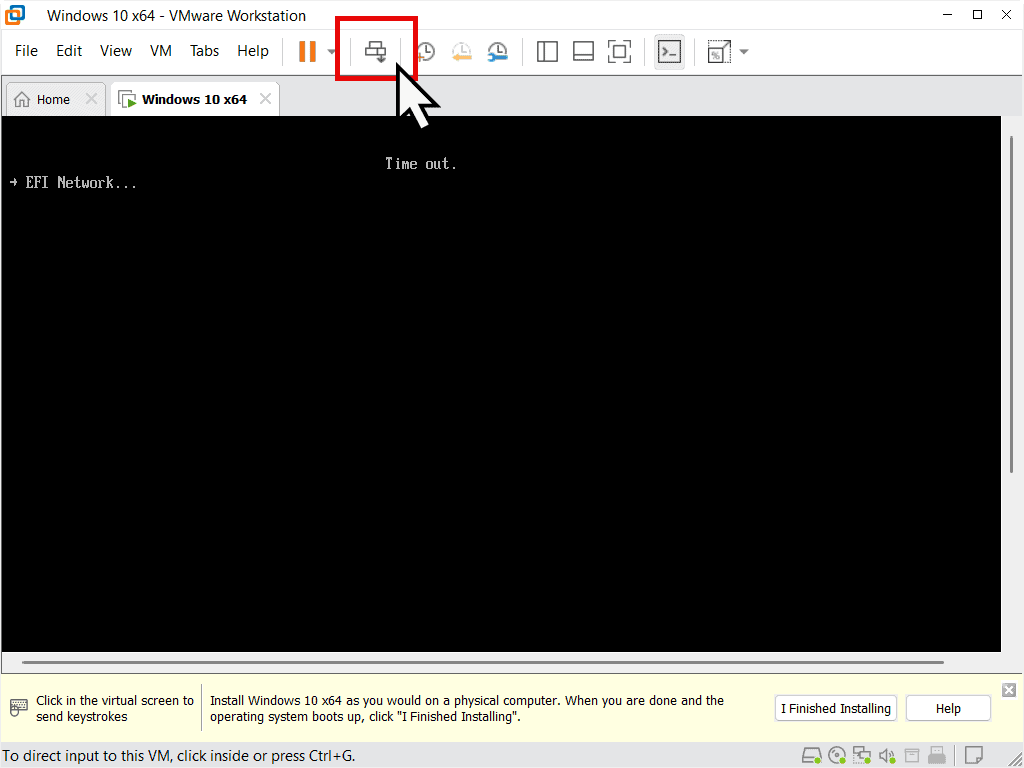
If you didn’t get it right you’ll see a Time Out – EFI Network screen. This is just the virtual machine trying to find a boot source. On the toolbar, click the “Send CTRL + Alt + Del to virtual machine” button.
The VM will reboot (just like a real PC would). This time make sure to click inside the VM window and then press a key on your keyboard. You have to be quick because the Time Out isn’t very long.
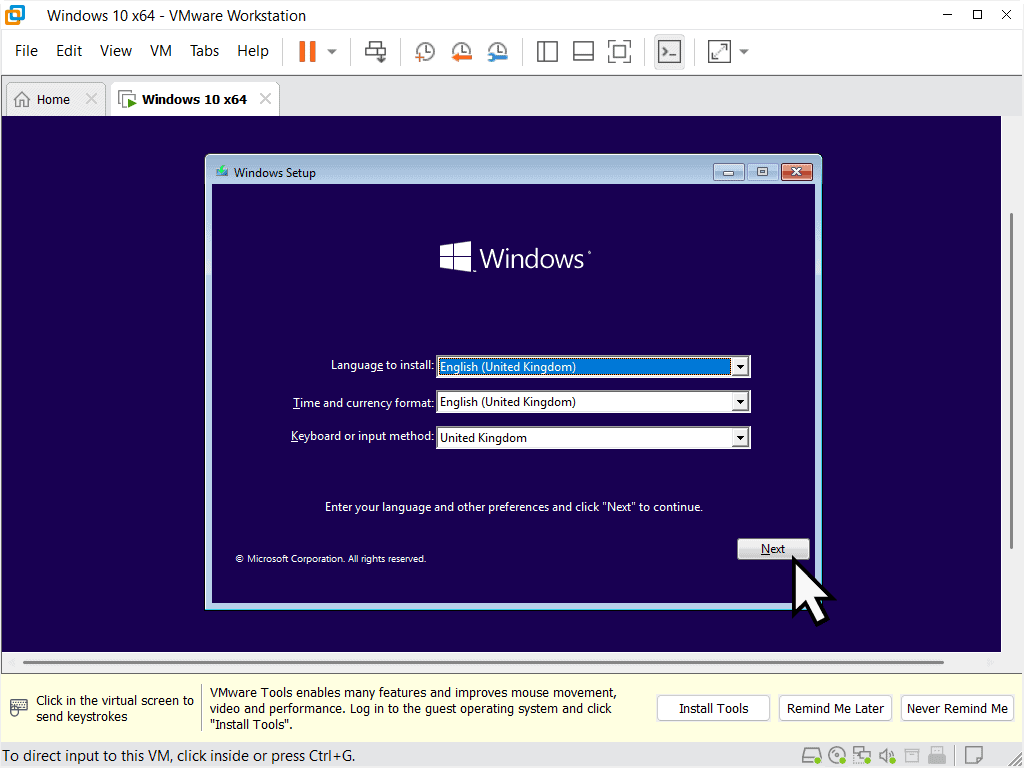
After getting the “Press any key” right, the virtual machine will boot from the Windows 10 ISO file in exactly the same way it would if you were installing onto a “real” bare metal computer.
Follow the screens through and get Windows installed.
Install VMware Tools.
When Windows 10 is installed and booted to the desktop, you’ll need to install the VMware Tools. The tools are a set of virtual drivers for the VM.
Click the Install Tools button at the bottom of the Workstation Pro window.
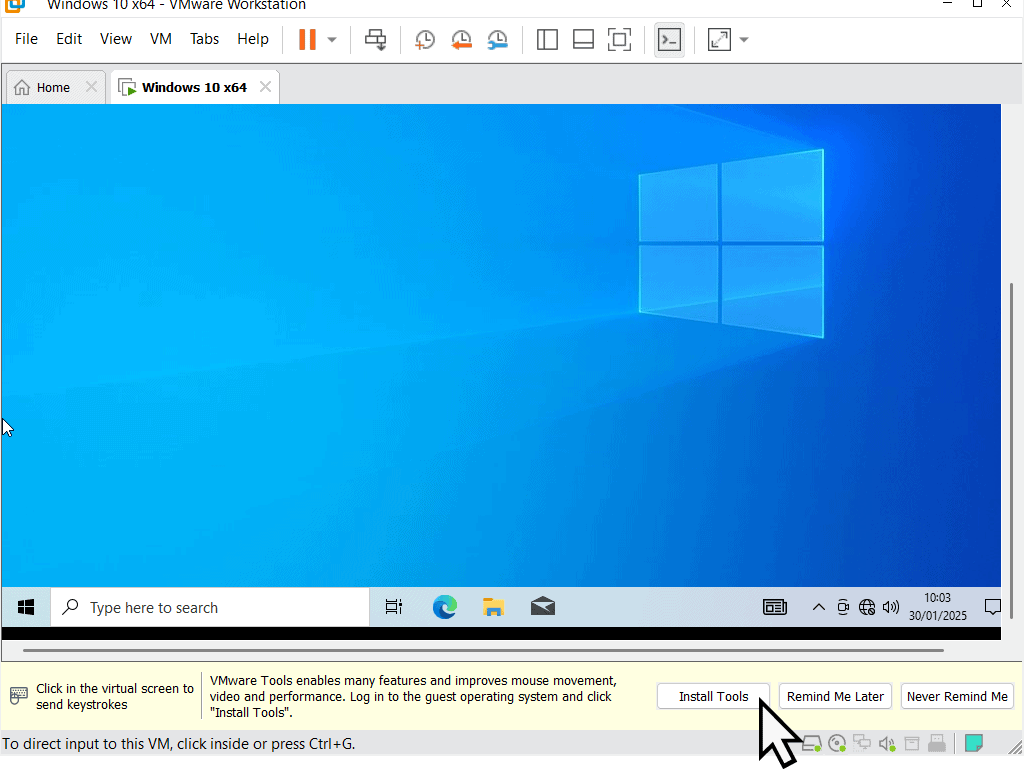
The VMware Tools are also an ISO file and will be loaded in to a virtual CD drive on your Virtual computer.
You’ll see the usual Autoplay Notification appear in the bottom right of the screen. Click on it and then the Setup file.
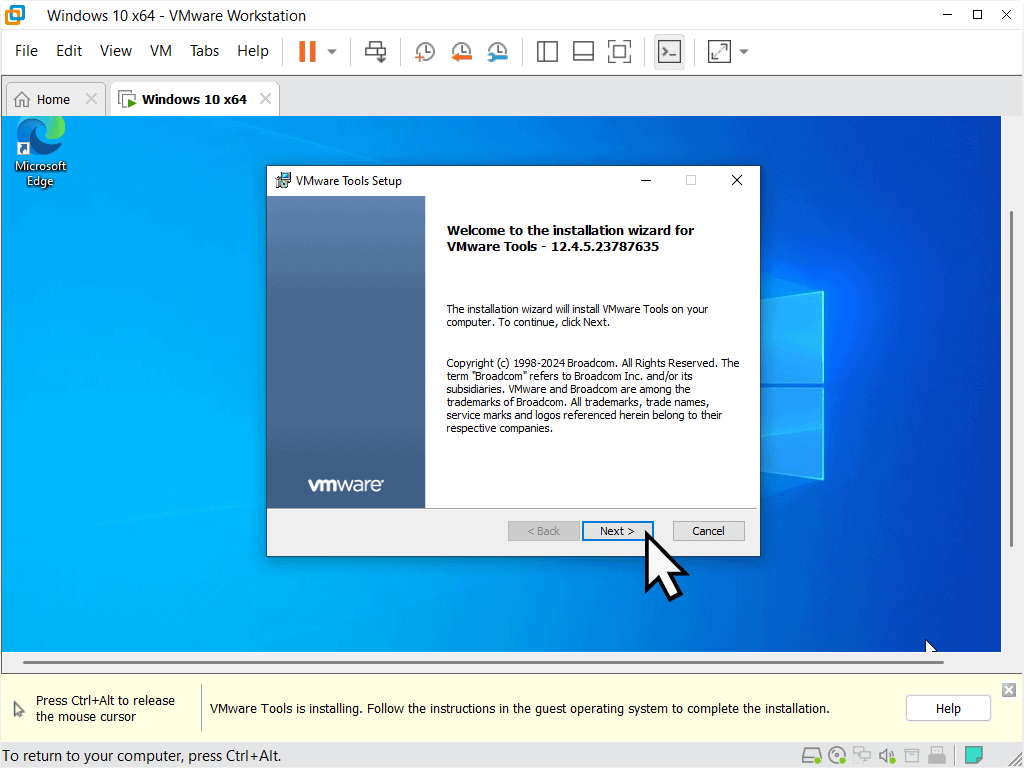
A standard installation wizard will open. Just click the Next button and install the Tools onto your Windows 10 VM. After a restart, you should be good to go.
Summary.
I think that on our home computers, having at least one VM is essential. It helps with security and testing out software. There are just so many scams out there, and some of them are so good, you just can’t rely on your own intuition any more.
Use your virtual machine to open emails, attachments, websites etc, without the worry of infecting your “real” computer.
VMware Workstation Pro makes setting up virtual machines really easy to do.
Related Posts.
How To Burn An Audio CD In Windows.
Want to burn an audio CD from your music collection? It’s easy in both Windows 10 and Windows 11

