The Windows 11 right click context menu has been changed to a more simplified version. Not everyone likes it.
The good news is that you can change it back to the original menu by adding a couple a registry keys. It’s easy to do and I’ll show you how below.
How To Restore The Old Right Click Context Menu To Windows 11.
To get Windows 11 to always show more options by default whenever you right click on an item (file, folder etc), you’ll need to create 2 new registry keys.
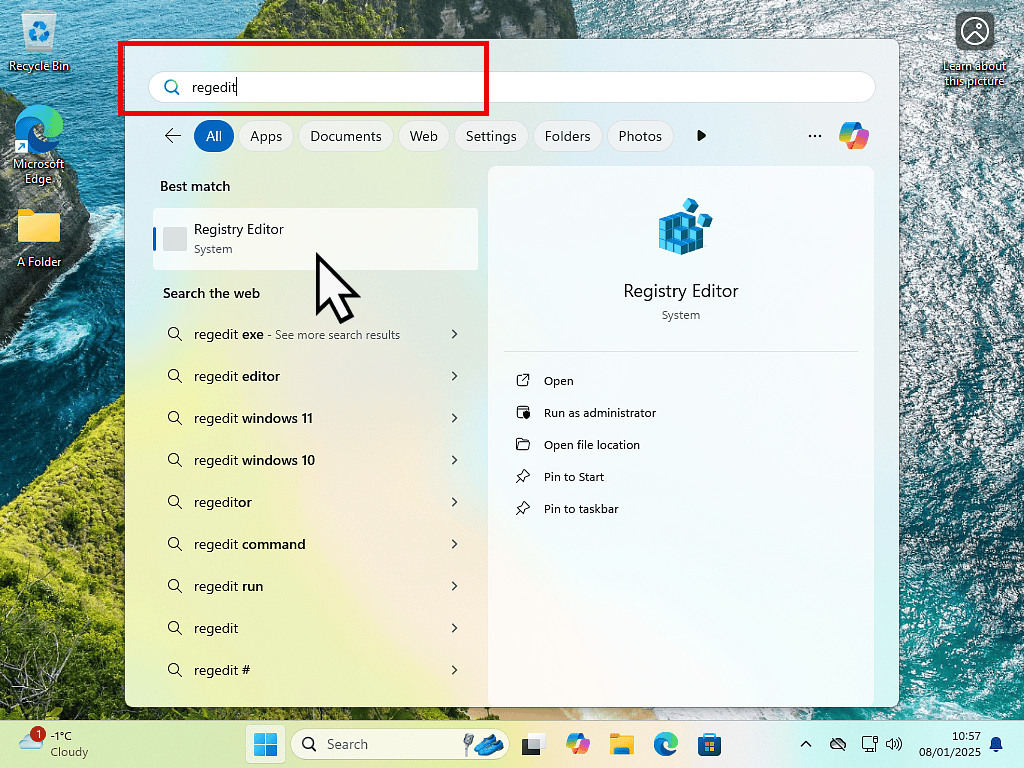
Open the Windows registry editor by clicking the Start button and then typing “regedit“. Click Registry Editor.
Create A New Registry Key.
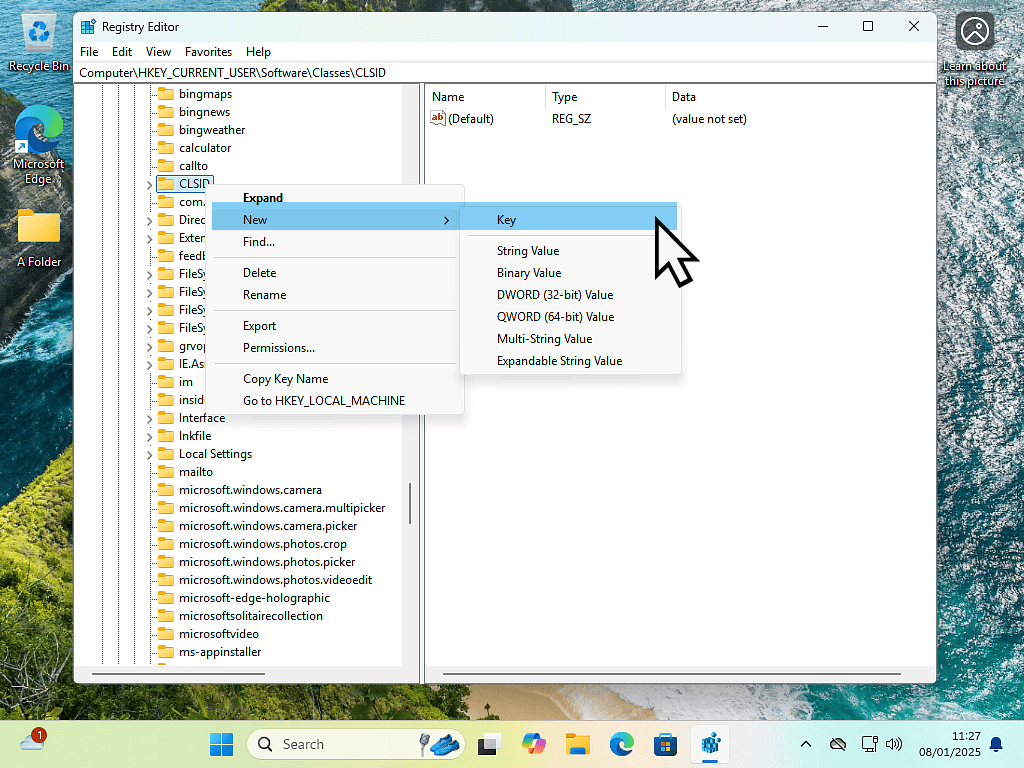
Inside Regedit, navigate to HKEY_CURRENT_USER\Software\Classes\CLSID
Create a new registry key by right clicking on the CLSID folder and then selecting New > Key.
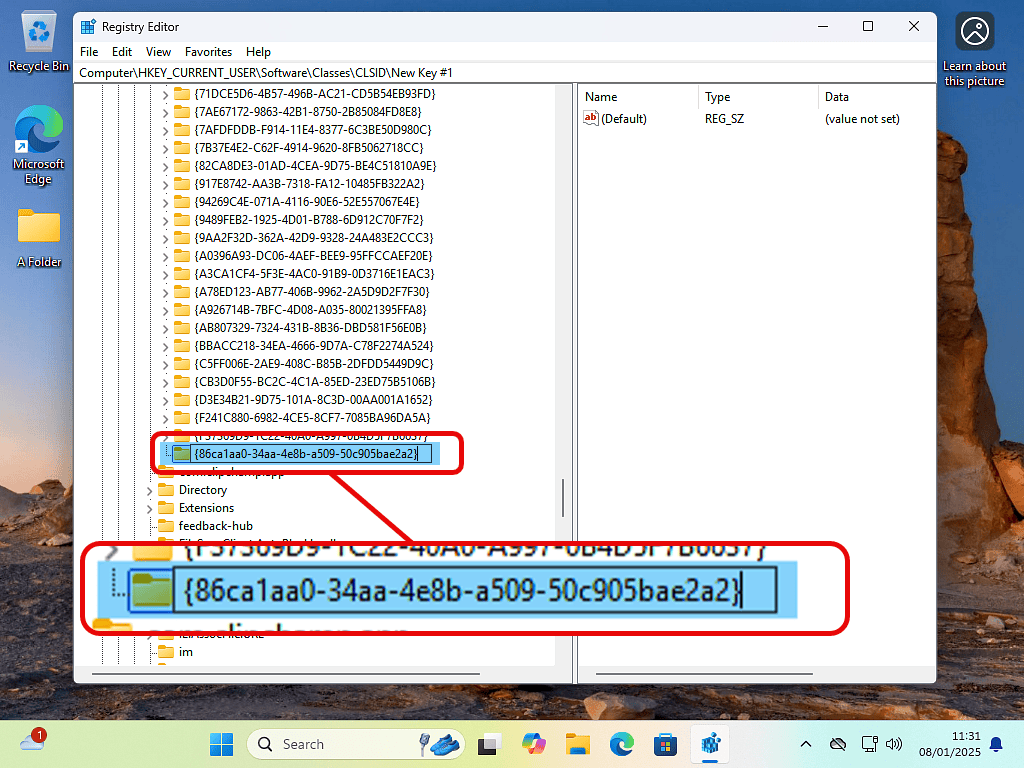
With the key created, you’ll need to rename it to {86ca1aa0-34aa-4e8b-a509-50c905bae2a2}
Create A New Subkey.
The next step is to create a new subkey inside the key you just created.
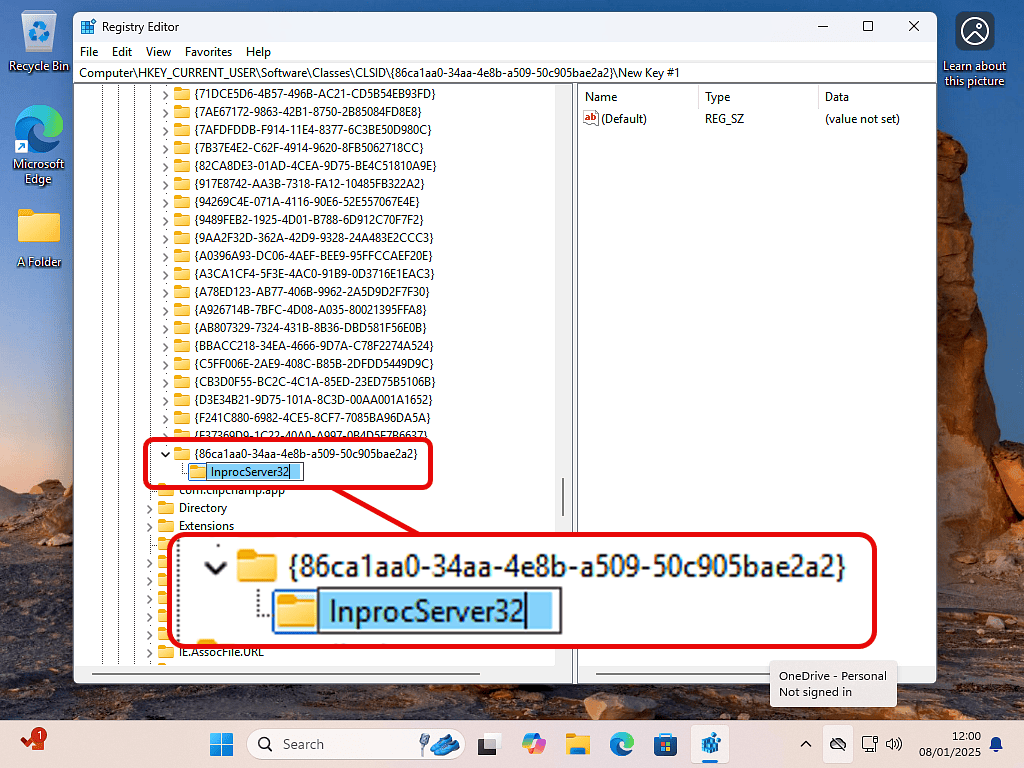
Right click on the {86ca1aa0-34aa-4e8b-a509-50c905bae2a2} key and then select New > Key.
Rename the new subkey to InprocServer32
Check The Value Data Is Blank.
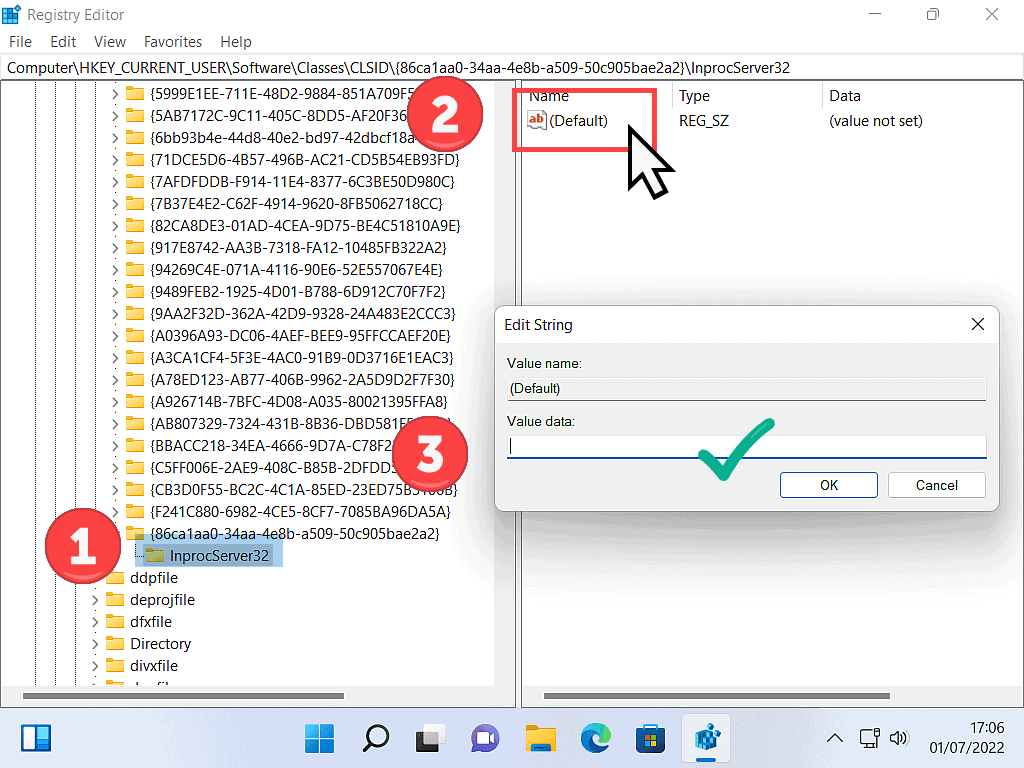
You’ll need to check that the Value data is blank for the subkey InprocServer32
To do that, left click once on the subkey to select it, then double click the Default in the left hand pane. The Edit String box will open. It should be blank. If it is, click OK and restart your PC.
If there’s a value in there, delete it, click OK and then restart.
Windows 11 Old Style Right Click Context Menu.
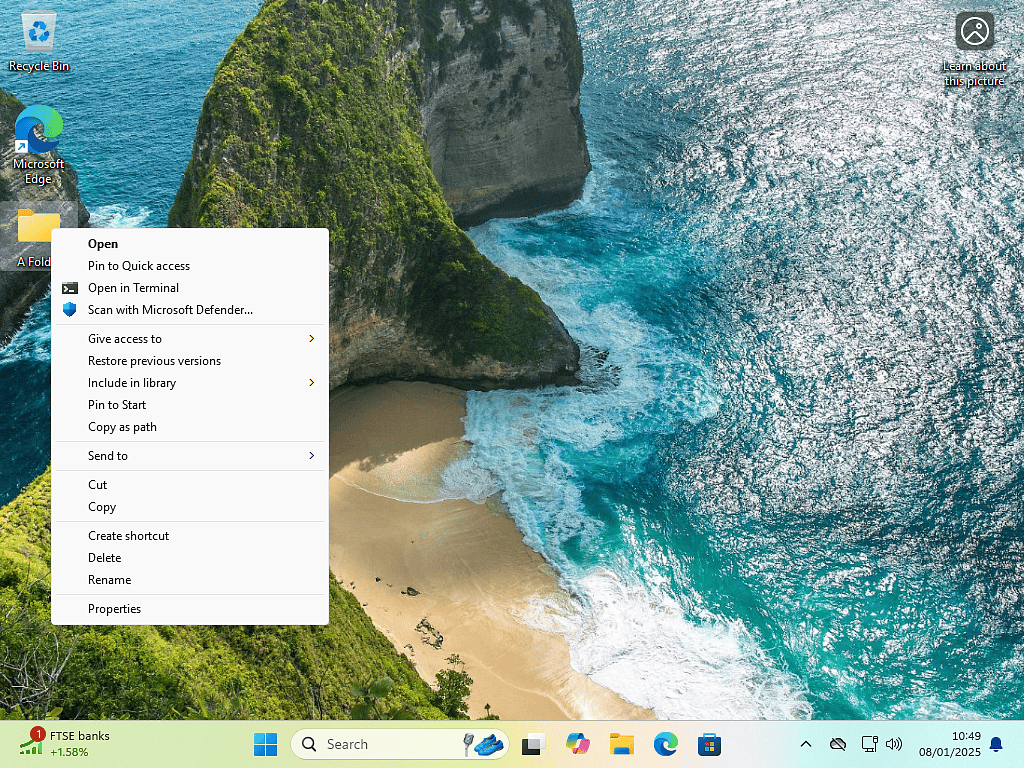
After restarting your computer, right click on anything and you should have the old style context menu back.
How To Go Back To The New Menu.
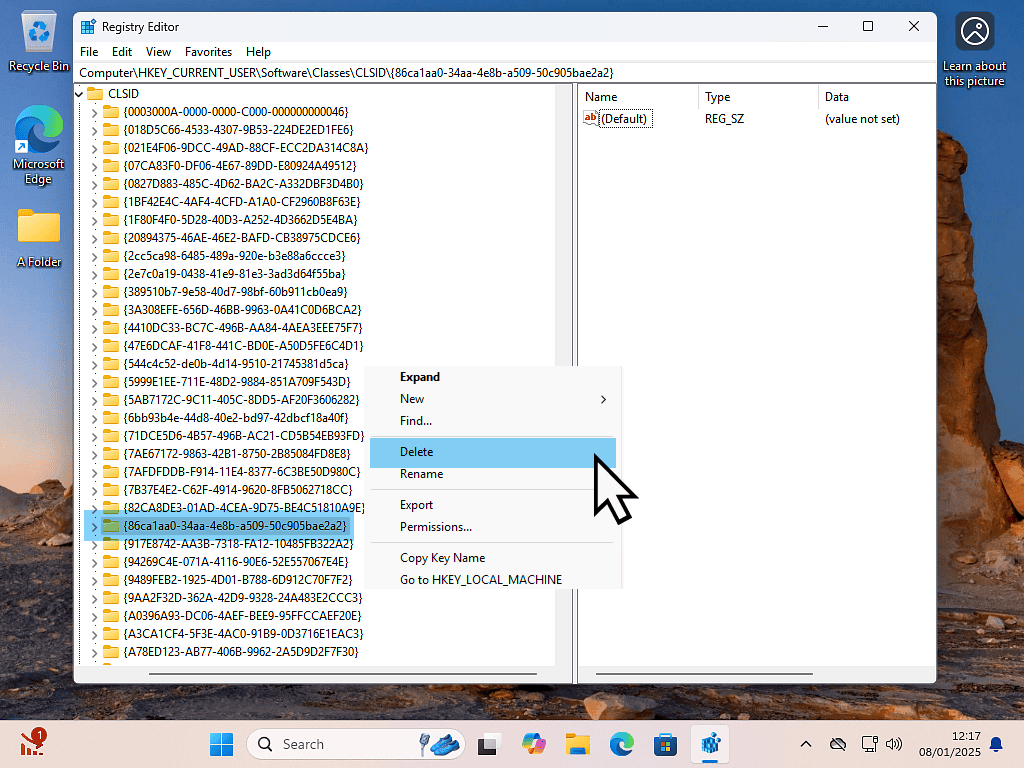
Should you decide that you prefer the new right click context menu, then you can easily return to it by deleting the registry key {86ca1aa0-34aa-4e8b-a509-50c905bae2a2}
Reboot your PC and you’ll be back where you started.
